Home / 3D Printers
Best 3D Printer For Kids And Teens
Choose filament for supervised printing with children. Liquid resin adds chemical handling and cleanup. Standard filament printers also avoid the proprietary supplies used by some toy printers.
Top pick
The A1 mini is compact, relatively quiet and can be ready in about 15 minutes. Use it with adult supervision in a suitable ventilated workspace, away from sleeping areas.
Older children and shared use Bambu Lab A1 · A school lab Creality K1C · Built-in filtration Flashforge Adventurer 5M Pro

| Printer | Setup to first print | Price | Noise | Enclosed | Room to grow |
|---|---|---|---|---|---|
1 |
About 15 minutes, all automatic | $ | Not published | No | The 180 mm bed is the wall |
|
Bambu Lab A1 mini details
| |||||
2 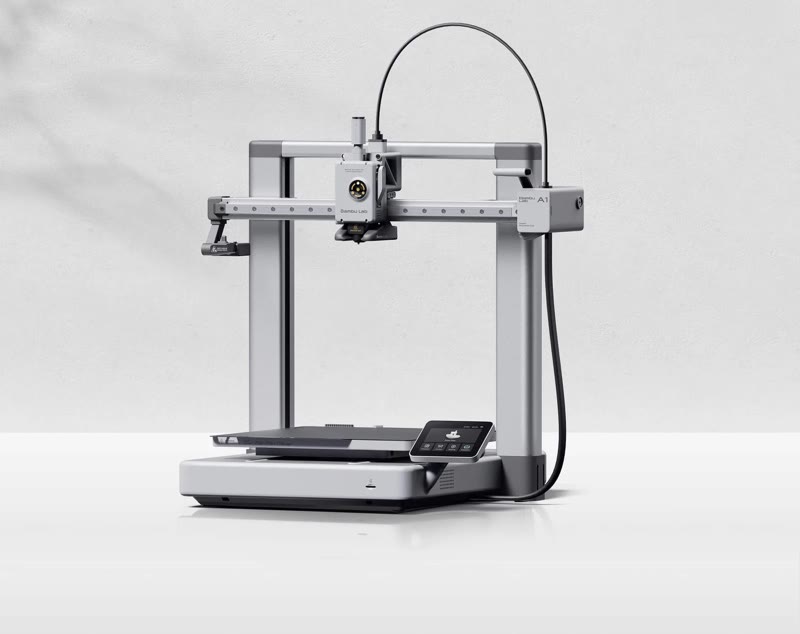 |
About 15 minutes, all automatic | $$ | 48 dB silent | No | A 256 mm bed; ABS is the wall |
|
Bambu Lab A1 details
| |||||
3  |
Built, ready to run | $$ | Under 45 dB silent | Yes | ABS and carbon fiber behind the walls |
|
Creality K1C details
| |||||
4  |
About 20 minutes, guided wizard | $$ | 45 dB silent, fan off | Yes | Grows into ABS and nylon |
|
Elegoo Centauri Carbon 2 details
| |||||
5  |
Under 10 minutes | $$ | 50 dB quiet, 55 standard | Yes | No multicolor upgrade |
|
Flashforge Adventurer 5M Pro details
| |||||
6  |
15 to 30 minutes, some assembly | $$ | 50–55 dB at speed | No | Open frame, so ABS warps |
|
Creality Ender-3 V3 KE details
| |||||
6 printers shown
No matches. Remove a filter to see more options.
M manufacturer figure V measured result I reviewed ? unverified
Compare printers side by side
Choose two printers to compare their full details. Add a third if you need it.
Select two printers to start comparing.

The Bambu Lab A1 mini is my first recommendation for most families buying a 3D printer for a child or teen. It handles calibration automatically, accepts ordinary filament, and lets your child learn to design objects without spending much. The catch is its open frame: you need a place where younger children and pets can’t reach the hot nozzle or moving bed.
If you want an enclosed printer to share, consider the Flashforge Adventurer 5M Pro. For a child who mainly wants to choose and make toys, the Toybox Alpha Three offers a more guided experience. The Bambu Lab P2S earns its higher price when a teen has bigger designs in mind.
Every choice needs an adult willing to learn the machine. Your child may soon choose files and prepare prints independently, but loading problems, stuck objects, and failed first layers still need someone responsible for sorting them out.
Match Your Child’s Readiness To The Work A Printer Needs
A 10-year-old who follows instructions and asks for help may be ready to share a printer with you. A 12- or 13-year-old may be ready to prepare their own designs. Their age alone doesn’t tell you whether they can safely handle a hot machine or troubleshoot a print that’s coming loose.
Think about what they want to do:
- Printing downloaded toys: They choose a model, check its size, and wait. A guided catalog means fewer choices for you to explain.
- Changing or designing objects: They need access to design software and a slicer—the program that turns a model into instructions for the printer. This suits nameplates, game-piece organizers, and small project cases.
- Learning printer mechanics: They want to understand belts, nozzles, and filament feeding. That’s a separate interest from designing a good object. You don’t need a machine that demands constant adjustment to learn design software.
Let your child take on one task at a time. They can start by choosing a small model and checking its estimated print time. Next, they can learn to choose the right printer and material settings, recognize a good first layer, and stop a failing job. An adult should handle work on the hot nozzle, clear jams, clean up prints with sharp tools, and deal with electrical problems.
Before buying, agree on who’ll load filament, remove cooled prints, clean the plate, and handle a failure halfway through a project. If all four answers are you, decide whether that sounds enjoyable. Printing will be your hobby too.
If you’re unsure, try a library or makerspace session first. Ask your child to choose or design one small object, then revise it after seeing the result. Wanting to make a second, improved version is a more useful sign of interest than being fascinated by a printer for ten minutes.

Recommended 3D Printers For Different Family Needs
Think about which jobs you want to share and how much space you have. The A1 mini is the value pick even for families who could spend more. The Flashforge adds an enclosure; Toybox simplifies choosing and preparing toys; the P2S adds build space and more capable controls. All four still need an adult’s help.
Flashforge Adventurer 5M Pro: An Enclosed Printer For Shared Family Projects
Choose the Adventurer 5M Pro if you want to sit down together, prepare a model on a computer, and print it inside a machine with a door and lid. Its 220 × 220 × 220mm build space—about 8.7 inches in each direction—fits useful projects such as a divided desk organizer or several small game accessories at once.
Make sure you buy the Pro. The cheaper Adventurer 5M has an open frame; the Pro includes the enclosure, camera, and HEPA/carbon filtration. Those differences matter when you’re sharing a printer with your child, but you still need to think about ventilation.
The touchscreen and automatic bed leveling make everyday use easier. For your own files, plan on a Windows or Mac computer running Flashforge’s desktop slicer, now called Flash Studio Desktop and formerly Orca-Flashforge, or a compatible alternative. Ubuntu software is also offered in beta. You can transfer files by USB without sending each job through a cloud account. The mobile monitoring app doesn’t replace learning to prepare a custom model.
In a reported hands-on test, a PLA model with nested sections that extend outward printed successfully on the first attempt, using standard settings with 0.2mm layers. Its sections moved freely. That makes it a reasonable choice for projects with parts that fit together, though it doesn’t mean every mechanism you download will work.
Reported setup experiences varied. One test required repeated calibration after an initial leveling failure; another, later month-long test reported nearly flawless first layers. Those tests used different machines and weren’t controlled to keep conditions and firmware the same. Treat automatic leveling as a helpful feature, and still set aside time for an adult to check the first prints.
You’ll also handle filament changes, plate cleaning, and nozzle maintenance. You can replace the nozzle assembly, but you’ll need to learn how to do that carefully. Flashforge advertises a one-year limited printer warranty and shorter, three-month coverage for extruder parts.
Its biggest drawback is that you still need to prepare files on a computer. If your child wants to browse toys on a tablet and press print, Toybox is a closer fit. If you’re comfortable supervising an open machine, the A1 mini is cheaper. Spend more on the P2S when your teen needs its larger build area or wants an automatic color-changing system that works with the printer.
Toybox Alpha Three: A Guided Start For Children Who Want To Make Toys
The Toybox Alpha Three makes sense when your child wants a small toy factory: pick something, choose a filament color, and make it. Its main advantage is the online catalog and Creator Space. They make finding models and preparing prints simpler, so you have less to teach at the beginning.
Check the full model and bundle name before buying. Alpha Three is the current version of the original small Toybox; listings for older Alpha models and renewed machines can look similar. The Starter bundle includes one Coconut Printer Food roll, the removable EZ-Peel bed, and access to the free catalog and Creator Space.
You can use an iOS or Android device or a web browser. An adult should create and manage the account, connect the printer to the home network, and check that the device your child will use can access it. Toybox specifies 2.4GHz Wi-Fi. You’re also relying on Toybox’s online service: this isn’t the choice I’d make for a family determined to keep printing independent of an online platform.
A small character or a toy assembled from separately printed pieces is a good project for this printer. Printing each piece in a different color also gives your child colorful results without an automatic filament changer. Expect small objects; a larger storage box or ambitious costume part is a reason to choose another machine.

You aren’t limited to catalog models. Creator Space accepts imported files, including STL, so your child can make a simple design elsewhere and bring it in. Keep the original design files on your computer. You can import your own designs, but that doesn’t mean you can freely export licensed catalog toys to another printer.
The free catalog and tools are enough to start. Toybox Plus is optional, with additional toys and features; its monthly plan was listed at $9.99. Pro is a separate, more expensive membership for Magic AI tools. Check which membership a bundle trial activates and what it will cost after the trial. A child who loves one particular licensed character may care more about its paid models than the size of the free catalog.
Simple controls don’t mean your child can handle everything alone. You still need to help with loading, calibration when needed, print removal, and failures. The open print area also leaves access to hot components. If you buy directly from Toybox, its policy describes a six-month manufacturer warranty; paid extensions run from the original receipt date rather than adding their full term afterward.
Choose the A1 mini instead if your child already wants control over print settings and larger original designs. Choose Toybox if you want help getting started with toy making. Its limits may frustrate a child who wants more control over printing.
Bambu Lab P2S: More Room For A Teen’s Original Designs
The Bambu Lab P2S is the upgrade I’d choose for a teen who can explain what won’t fit on a smaller printer. Its enclosed 256 × 256 × 256mm build space gives you roughly a 10-inch cube for larger organizers, robotics-project housings, or batches of parts. Not every costume helmet will fit in one piece, but you get much more room than on the A1 mini.
The P2S follows the P1S and adds a larger, 5-inch touchscreen, improved monitoring and error detection, and a hotend—the heated nozzle assembly—that you can swap quickly. Those changes help a new owner operate and maintain it. They don’t make the P1S incapable, but the P2S is the more appealing starting point when the price difference is modest.
Your teen can use design software, export a model, and prepare it in Bambu Studio. Windows, macOS, and Linux versions are available. The slicer lets them change how a model sits on the print bed, its wall thickness, the supports printed to hold up overhanging parts, and other settings that affect whether a part fits and works. They can learn those skills while using automatic calibration rather than assembling a printer from a kit.
For a realistic project, have them measure a group of game pieces, design a divided tray, and print a small corner first to check the fit. Only then print the whole organizer. That approach saves material and teaches more than buying an expensive machine and filling its bed immediately.

Reported testing produced clean PLA game blocks at a 0.2mm layer height with standard settings; each plate took about two hours and 40 minutes. That’s a useful reminder that worthwhile projects still take hours. These results aren’t from testing the same file on all four printers, so they don’t tell you which is faster.
Start with PLA. Your teen can try PETG later for suitable practical projects, and flexible TPU adds another skill to learn. Before using an automatic filament feeder, check that it can handle the exact filament you’ve chosen. Even if the printer can heat other materials, your room may not have the ventilation needed to use them.
The optional AMS 2 Pro in the Combo makes automatic color changes possible. Buy it when your teen wants repeated multicolor designs and accepts extra setup, longer jobs, and waste from flushing the previous color out of the nozzle. For organizers and prototypes, the standalone printer is enough. Separately printed colored pieces can be cheaper and quicker.
You need a Bambu account for its phone and cloud features; local-network printing is an alternative. Bambu has also changed its rules for how other apps can control the printer, so plan around Bambu Studio rather than assuming every external app will work identically. If your teen’s projects fit the A1 mini, that cheaper printer already supports learning design. Pay more for the P2S if you need the extra space or easier controls.
Bambu Lab A1 Mini: The Best Way To Keep Your Starting Cost Down
The A1 mini is the budget pick because it automates jobs that can frustrate a beginner: leveling the bed, setting the nozzle height, and adjusting how much filament comes out. You still learn how printing works, but you can spend more of that time choosing a sensible model and understanding its settings.
Its 180 × 180 × 180mm build space is about seven inches in each direction. That’s enough for a phone stand, a small articulated animal, a personalized nameplate, or a first electronics-project enclosure. Check actual dimensions before promising a large object; shrinking a model also makes its holes and the gaps between parts smaller, so its pieces may no longer fit.
For straightforward downloaded models, Bambu Handy and compatible MakerWorld print profiles let you start from a phone. Those profiles are saved printing settings, and you still need to choose one for the right printer and material. Don’t assume a community library is a children’s catalog; browse it together at first.
When your child wants to alter dimensions or print an original design, move to Bambu Studio on a computer. A school-issued Chromebook isn’t automatically a substitute for a computer that can run the software, especially if software installation is restricted. The mini also supports preparing files for its microSD card, which is useful when you don’t want every print to depend on cloud transfer.
Reported testing found a clean, support-free PETG figure at a 0.2mm layer height and 200–300mm/s settings. A flexible TPU test needed its model’s rounded base modified before printing. Those examples show what your child can learn as they progress. They also show that sometimes the file needs fixing, even when the printer is working properly.
The biggest drawback is how easy it is to reach the hot and moving parts. The heated bed moves back and forth, and the nozzle is exposed. I wouldn’t choose it for a playroom table that children can reach, or for a child who still reaches toward interesting moving objects. Choose the enclosed Flashforge if you need a door and lid to keep hands away, while still controlling who can open it.
Buy the single-color printer first unless you already have a reason for the AMS lite accessory. The add-on needs more space and more filament, and color changes create waste. The included filament sample is also too small to rely on for your projects: buy a full roll of PLA.
An adult will need to make time for cleaning the plate, clearing feeding problems, and following the maintenance schedule. Replacement hotends and wear parts are sold separately. The mini is cheaper, but you’ll still need to handle its upkeep.

Check The Printer’s Safeguards Against Your Home Setup
Choose the workspace before the printer. You need a firm surface, enough room to reach the parts you’ll need to maintain, and a way to keep children and pets away when an adult isn’t supervising. Don’t make your child’s bedroom the default just because the machine fits on a desk.
Check three things separately:
- Hot and moving parts: A door and lid create a barrier. They aren’t automatically a child lock or a guarantee that all movement stops when opened. Wait for the machine and print to cool, and let an adult handle stuck parts or work on the hotend.
- Air: Filament printing can release ultrafine particles and gases, including when printing PLA. Use a separate, ventilated area and focus on capturing emissions near the printer and venting them outdoors where possible. An open window alone doesn’t tell you whether you’re controlling emissions well enough.
- Supervision: Cameras and error detection help you notice trouble. They don’t replace an adult who can respond, and they don’t justify leaving children to handle a failed print alone.
The Flashforge’s HEPA and carbon filters serve different purposes: HEPA captures particles, while carbon traps gases on its surface. The P2S’s standard activated-carbon filter isn’t equivalent to a HEPA particle filter. Neither printer’s enclosure or filter guarantees that the air in your room is harmless. Maintain filters as instructed and start with plain PLA rather than adding ABS or specialty blends simply because a printer supports them.
Resin isn’t my recommendation for a child’s first home printer. Handling uncured resin, washing parts, finishing the cure under UV light, and dealing with contaminated waste all involve chemicals that an adult must handle. “Water-washable” changes the cleaning process; it doesn’t make leftover resin or wash water suitable for the sink.
Allow more space than the printer’s listed dimensions. The Adventurer 5M Pro is roughly 15 inches wide and 16 inches deep without its spool holder. The A1 mini needs room for its bed to move; both Bambu color systems need additional space. Allow access to doors, filament paths, cables, and waste collection rather than pushing everything against a wall.
Noise from the fans and moving parts can also disturb sleep or quiet homework. Keep that in mind when choosing a spot; advertised noise figures measured in different modes don’t make a useful comparison. Inspect finished toys for sharp scraps and small loose parts before handing them to younger children.
Budget For Your Child’s First Projects And Continued Use
These US prices were listed on September 5, 2026, and are rounded to the nearest dollar. They apply to new machines and the specified bundles. Sales, shipping, and local stock can change the total.
| Printer or bundle | Listed hardware price | Practical starting budget* |
|---|---|---|
| Bambu Lab A1 mini, without AMS lite | $220 | $265–$290 |
| Flashforge Adventurer 5M Pro | $449 | $494–$519 |
| Toybox Alpha Three Starter, one roll included | $209 | $239–$254 |
| Bambu Lab P2S, without AMS | $550 | $595–$620 |
For the Bambu and Flashforge machines, allow $20–$30 for a kilogram of plain PLA and $25–$40 for basic cleanup supplies, suitable small tools, and sealed filament storage. For Toybox, allow $15 for another branded roll and $15–$30 for cleanup and storage. Check the supplied tools before buying duplicates. These budgets exclude tax, shipping, a computer, furniture, and any ventilation equipment your room needs.

The standalone P2S price was available for store pickup; the P2S Combo was listed at about $750 for shipping. Don’t compare that bundle against a bare-printer price. Flashforge also advertised an additional cart discount, which isn’t included in the budget above.
For ongoing costs, use weight rather than “toys per roll.” At $25 per kilogram, a 50g object uses $1.25 of filament before supports, failures, or color-change waste. Toybox’s smaller branded rolls aren’t kilogram spools, so compare their weight as well as their price.
Keep a little money aside for a replacement nozzle or hotend, a worn build surface, and replacement filters if your printer uses them. Don’t count on a warranty covering ordinary wear. Free models and included software are enough to begin; Toybox’s optional $9.99 monthly Plus plan alone adds about $120 over a year.
For most families, I’d buy the A1 mini and one roll of PLA if its open frame suits the workspace. Choose the Flashforge for an enclosed shared setup, Toybox for guided toy making, or the P2S for a teen with larger projects. If nobody wants to take care of the printer, book another makerspace session before you buy.


