Anycubic Kobra 3 Max Review
Budget large-format base printer · Color Combos cost more
Our verdict
I’d choose the original Kobra 3 Max as a discounted, single-color printer for large PLA and PETG projects. Its size can save assembly work on props, but I’d allow for upkeep and extra attention to bed adhesion on long jobs. Before paying more for the original Combo, I’d compare the newer V2.
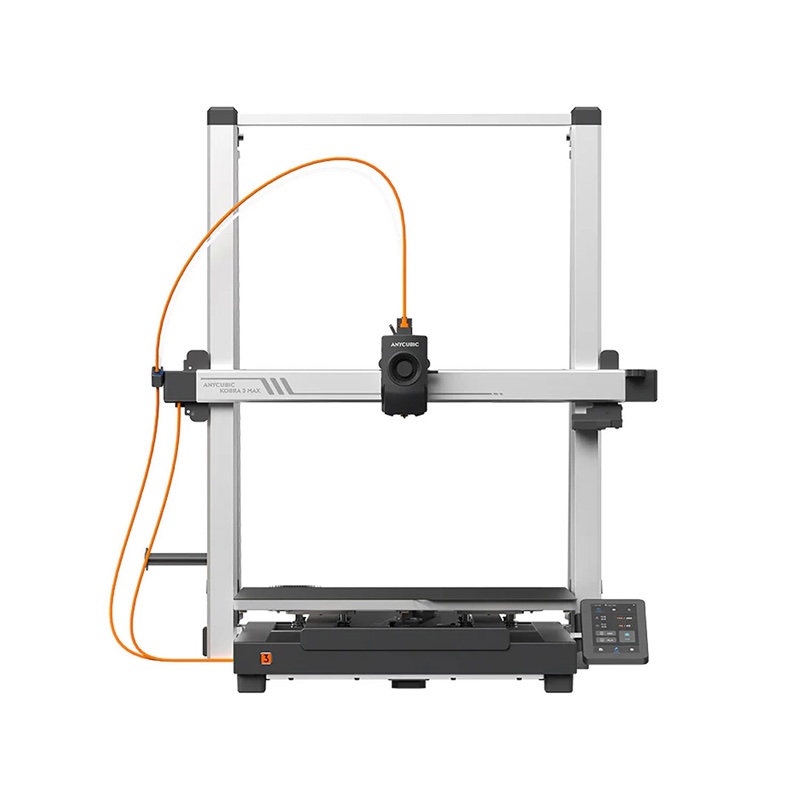
Best atLarge, one-piece PLA and PETG props that would need joining on a smaller printer.
Less suited toSmall workspaces, regular oversized ABS or ASA printing, and projects that cannot tolerate interruptions.
The Key Specs
| Print area | 420 × 420 × 500 mmCheck your actual model with supports and any brim before buying. |
|---|---|
| Operating space | 706 × 940 × 753 mm, including spool holder and bed travelAllow further room for access, cables and the separate ACE Pro. |
| Material fit | Open frame; PLA and PETG are the clearest matchOrdinary TPU 95A needs an external spool. Large ABS and ASA parts are a poor reason to choose this printer. |
| Setup | Automatic leveling and nozzle-height adjustmentYou still need secure assembly, a clean plate and a first-layer check. |
| Color printing | Four colors with one original ACE Pro; eight with extra hardwareA single nozzle purges between colors, adding waste and print time. |
| Monitoring | Separate camera requiredInclude the camera in your budget if you want video monitoring or camera-based failure detection. |
Which Version Should You Buy?
- Original base printer
- Costs less. Choose it for single-color PLA or PETG projects, especially props you plan to paint.
- Original four-color Combo
- Adds one original ACE Pro. Choose it if you will regularly use color changes, heated drying or matching backup spools.
- Original eight-color setup
- Choose it only for projects that need more colors. Confirm two ACE Pro units, the Max-compatible eight-color feed module, tubes and cables are included.
- Kobra 3 Max V2 Combo
- Compare its premium before buying the original Combo. It adds a full-metal hotend and ACE 2 Pro, but the new hardware does not yet establish better long-term performance.
Budget beyond the printer. Allow for filament used in the model, supports, purge waste and failed prints, plus plate-cleaning supplies, grease and occasional replacement nozzles, cutters or wipers. A compatible camera costs extra. Eight-color printing needs the second ACE Pro and connection hardware.
More Specs And Ownership Details
| Nozzle / bed limits | 300°C nozzle; 90°C bed. These limits do not establish reliable large ABS printing. |
|---|---|
| Speed claims | Anycubic advertises 600 mm/s maximum and recommends 300 mm/s. Use your model's slicer estimate to compare job times. |
| File transfer | USB, local network, or Anycubic cloud and app. Local-network support does not mean an Ethernet socket. |
| Original ACE Pro | Drying while printing, rated up to 55°C; drying speed has not been established by a controlled comparison. Allow roughly 366 × 283 × 235 mm plus lid and spool access. |
| ACE generation compatibility | ACE 2 Pro uses model-specific connection hardware on the original Max and cannot operate alongside an original ACE Pro. Check the required kit and firmware. |
| Routine upkeep | The v1.1 manual recommends greasing X/Y metal shafts monthly and Z lead screws every three months, after cleaning away dust and plastic. |
I’d consider the Anycubic Kobra 3 Max for helmets, broad costume panels or large models that would otherwise need joining from smaller pieces. Its size can save you hours of joining, filling and sanding. If you mostly want small desk toys, you’re taking on a very large printer for little benefit.
The original Kobra 3 Max is easiest to recommend as a discounted, single-color printer for big projects in PLA and PETG, two common printing plastics. The Combo adds the original ACE Pro, which feeds and dries filament, the plastic strand wound onto each spool. Color changes bring more waste and longer jobs, and you may need to give long prints extra attention to keep them stuck to the bed, the surface the printer builds on.
There’s now a Kobra 3 Max V2, too. This review covers the original printer and ACE Pro Combo; the V2’s arrival makes the price difference especially important.
How Much Room Does The Kobra 3 Max Need?
The print area measures 420 × 420 × 500 mm, or about 16.5 × 16.5 × 19.7 inches. That gives you plenty of room for oversized pieces, but a helmet doesn’t automatically fit just because another helmet does. Check your actual file at the size you need, including any temporary supports that hold up parts of the model during printing.
A slicer—the program that turns a model into printing instructions—can show whether it fits before you buy. Leave room for a brim if needed: that’s a thin border printed around the base to help it stick. A model that reaches every edge leaves no room for that extra border.
The printer measures 706 × 640 × 753 mm. Those numbers don’t describe all the room it needs while printing. Anycubic’s English v1.1 Combo manual lists 706 × 940 × 753 mm including the spool holder and bed movement, roughly 27.8 × 37 × 29.6 inches. The bed travels forward and backward with your print on top.
Even those larger dimensions don’t cover all the space you’ll need. You still need access to remove the plate, reach connections and work on the printer. Cables and filament tubes need room to move without catching on anything.
The ACE Pro occupies another roughly 366 × 283 × 235 mm. The installation guidance places it on the left, with a 10–15 cm gap. Allow room to open its lid and change spools, too. The full space needed for cables and maintenance hasn’t been independently measured. Use the manual’s dimensions as a starting point, then allow extra working room on a sturdy surface.
Getting The Kobra 3 Max Ready To Print
You’ll need to assemble some parts of the printer before using it. You’ll release the shipping fasteners, secure the upright frame and braces, attach the printhead and screen, and connect the wiring. Clear enough space to reach both sides before you start.
Pay particular attention to the printhead cable. Its connector uses retaining screws, and the manual also shows cable holders and organizers. Follow the manual’s instructions for where to run the cable and filament tubes. They must reach the moving head throughout the print area.
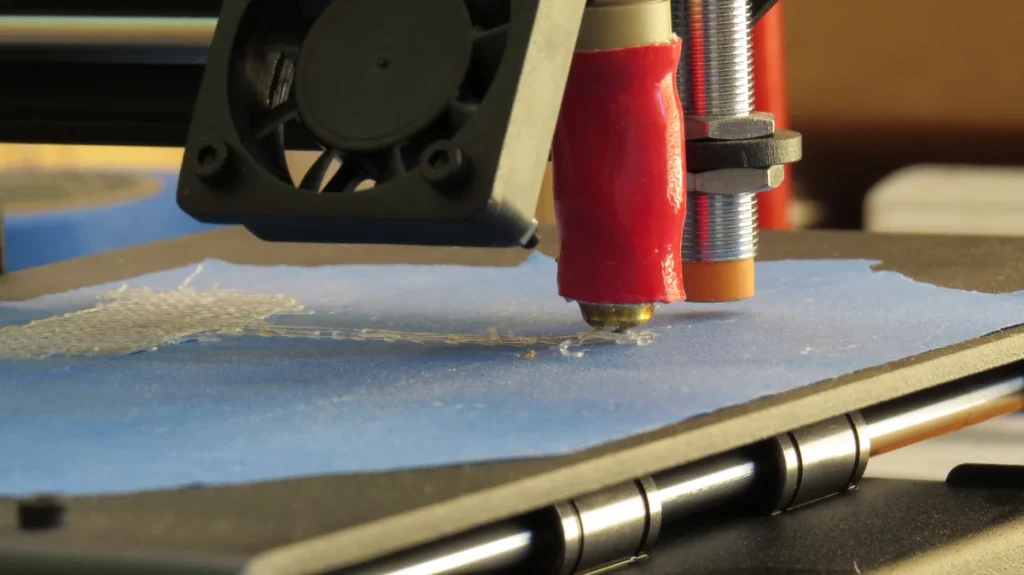
Automatic leveling measures the bed so the printer can compensate for small height differences. Automatic nozzle-height adjustment helps set the gap needed for the first layer. These features reduce setup work, but the printer still needs to be securely assembled and the plate needs to be clean. Install the removable plate before calibration, and watch the first layer of your initial prints.
For file preparation, Anycubic Slicer Next is the natural starting point. It’s based on OrcaSlicer and gives you a model preview and settings for supports, material and print quality. Select the settings preset, called a profile, for the original Kobra 3 Max and choose the nozzle size you actually have. For the Combo, check that the colors assigned in the file match the spools in the ACE Pro’s slots; third-party filament doesn’t need an identification chip, but you must enter its details yourself.
You can print from USB, send files over your local network, or use Anycubic’s cloud service and app. Local-network mode lets your computer communicate with the printer over your network; it doesn’t mean the printer has an Ethernet socket for a wired connection. Video monitoring and camera-based failed-print detection require a separate camera.
Install the current official software for your operating system, then try a small file before committing to a large job. Save settings that work so you can compare them after an update. In reported July 2025 testing, the supplied Kobra OS software didn’t let users access its configuration files to customize how the printer works. If you want to change how the firmware—the printer’s built-in software—controls it, confirm that it supports your intended changes before buying.
How Well Does The Kobra 3 Max Handle Big Prints?
The useful question is whether a finished print saves you work. A clean, one-piece prop can be worth waiting for; a failed print halfway through a spool can’t.
One reported PETG test produced smooth, oversized traffic-cone parts in 47 and 37 hours. The test used 0.28 mm layers, three outer walls and otherwise default settings, with a reported average speed of 130 mm/s and a listed nozzle size of 0.4 mm. The parts consumed about 3.2 kg combined. The firmware version wasn’t specified, and it wasn’t clear whether those times included heating and calibration before printing.
Those separate print times add up to 84 hours. The result shows what a substantial project can involve, but it doesn’t tell you how often jobs this large finish successfully or how accurately mechanical parts fit together. Smooth surfaces and a good fit are different requirements. The wall setting controls how many passes the nozzle makes to form the outside of each layer. Changing that setting or the layer thickness changes how long the print takes.
Anycubic advertises a maximum 600 mm/s and recommends 300 mm/s. Neither number tells you how long your model will take to print. The head slows for short movements and details, while material settings and cooling also affect progress. Compare the slicer’s estimate for your own model at a quality you’d accept. Don’t calculate a job time from the headline speed.
Heating is another separate measure. Anycubic claims the bed heats from 25°C to 60°C in 125 seconds. That’s Anycubic’s claim for heating alone. It doesn’t tell you the total time from pressing Print to laying down plastic. Leveling and other calibration routines also take time, so check what’s included when you compare reported print times.
Keeping the print stuck down deserves attention: the July 2025 test needed glue on jobs exceeding 12 hours. Work out how to clean the plate and keep your chosen material attached before attempting your largest piece. That test doesn’t mean every long print fails or that you automatically need to buy another plate.
Layer shifting is a different problem. That’s when the printer starts placing layers sideways from where they belong, often leaving a step in the model. A part can remain stuck firmly to the bed and still suffer a shift. Something blocking the printer’s movement, or a problem with a belt or pulley, needs a different fix from a part peeling off the plate. The Kobra’s dual bed motors and belt-tensioning features don’t guarantee against either failure.
For your first large project, print a small section that includes an important joint or a part that extends out over empty space, called an overhang. Confirm that it fits and looks right before spending several days on the whole piece. If you’re making a batch of separate objects, the Kobra’s object-skip feature can stop printing one troublesome item while continuing the others. It can’t rescue the upper half of a single failed helmet.
What Does The Kobra 3 Max Combo Add?
The original four-color Combo pairs the printer with one original ACE Pro. Four spools feed a single nozzle; it isn’t four printheads working at once. Eight-color printing requires a second ACE Pro and the compatible eight-color feed module, plus the connecting tubes and cables. A listing that says the printer supports eight colors doesn’t mean the cheaper bundle includes the equipment for all eight.
Every color change takes time to unload, load and clear the previous color from the nozzle. That clearing process is called purging. Some of the plastic ends up as discarded waste. Some can go inside a model or into a separate purge object, where the mixed colors don’t matter.
In the same reported testing, an eight-color PLA dragon weighing 220 g required 357 g of filament purged from the nozzle plus four 35 g purge objects. At 0.2 mm layers and a reported average 75 mm/s, the print involved 902 color changes and took 48 hours.
Keep those quantities separate when you work out the cost. The purge objects used 140 g; they’re useful output only if you wanted them. The 357 g wasn’t part of the dragon. Other models won’t necessarily waste the same proportion of filament: their color layout and settings determine how many changes they need.
If you’ll paint a prop, print it in one color. If you want several identical colored objects, compare a full plate with one object in the slicer. A batch can share color changes across several objects, which can make more sense than repeating those changes in separate jobs. Always check total filament use as well as the weight of the model.
Automatic refill may matter more than color for big projects. With suitable spools of the same material and color set up as backups, the ACE can switch to another spool when one runs out. Enable the feature and check the material and color assignments. Try a supervised changeover before relying on it for a long print; there aren’t repeated, controlled refill tests to show how reliably it works.
The original ACE Pro also offers drying while printing, rated up to 55°C. That’s convenient, but there’s no controlled drying comparison to show how quickly it dries damp filament. Follow the filament’s drying requirements rather than assuming the heater makes every loaded spool ready immediately.
Anycubic now lists ACE 2 Pro compatibility with the original Max, using model-specific connection hardware. It cannot operate alongside an original ACE Pro. Check the required kit and firmware before buying an upgrade; the two generations aren’t interchangeable additions to the same color setup.
Which Materials Can The Kobra 3 Max Print?
PLA and PETG are the clearest match for this printer. PLA is a sensible starting point for display models and props. PETG is worth considering for tougher everyday parts, provided its properties suit the job. A large print area alone doesn’t make a printed bracket suitable for every load or temperature.
Flexible TPU needs a separate decision. Anycubic supports ordinary TPU 95A when fed from an external spool for single-color printing, but excludes it from the original ACE Pro. A reported success with Bambu TPU for AMS doesn’t establish compatibility with ordinary soft TPU. Choose filament that’s compatible with the way you’ll feed it into the printer, rather than assuming everything labeled TPU behaves alike.
ABS guidance is inconsistent. The original Max’s official FAQ includes ABS, while its main list of supported materials emphasizes PLA, PETG and TPU. The printer has a 300°C nozzle limit and a 90°C bed limit, but those figures don’t prove that it can reliably finish a large ABS part.
ABS contracts as it cools and can warp, especially in large pieces. A warm enclosure helps control that problem; the original Max is open. With no controlled large-ABS results to settle the question, I wouldn’t choose it for regularly printing oversized parts in ABS or ASA plastics.
For that need, look at an enclosed printer designed around those materials. The newer Kobra S1 Max is one relevant alternative with a heated chamber, but its print space measures 350 mm in each direction, giving you less room than the original Max in all three dimensions. Check that your model fits before treating it as a substitute.
What Upkeep Does The Kobra 3 Max Need?
Expect to clean, inspect and occasionally troubleshoot the printer. If opening a printhead or waiting for a replacement part would disrupt your plans, that matters more than another small price cut.
The clog evidence is mixed. One test reported a single clog in more than 600 printing hours. Separate owners describe repeated cutter jams and clog alerts, including alerts that clear when printing resumes; others report hundreds of productive hours. These experiences vary, and they don’t tell you how often printers fail or establish one cause behind every complaint.
A clog alert also isn’t a diagnosis. Plastic stuck in the nozzle, trouble feeding from a spool, and a problem around the cutter can interrupt printing in different ways. Record the error code, material, which spool slot you’re using and when the problem happened during the print. That gives support something more useful than “it stopped again.” Avoid adopting somebody else’s modification as a guaranteed cure.
The hotend—the heated assembly that melts filament—is removable for replacement. You’ll still need to clean it and work out what’s causing a problem. Keep the area around the cutter and purge mechanism clear, and inspect the filament path when filament stops feeding smoothly. Check cables for rubbing and belts for visible wear or debris. Follow the Max’s belt-adjustment instructions rather than simply tightening everything.
Anycubic’s v1.1 manual recommends greasing the horizontal metal shafts (X/Y) monthly and the vertical lead screws every three months. The lead screws are the threaded rods that raise and lower the head. Clean away dust and plastic before applying grease. Put those checks on your calendar if you expect regular use.
Official Max accessories still include nozzles, printhead assemblies, build plates, cutters and wipers. A listing doesn’t guarantee that your exact part is ready to ship locally, so check model compatibility and availability when you need it.
Read the warranty details, too. The US policy lists three months for the printhead, extruder assembly, magnetic platform, cutter and extruder gear; six months for the heated bed; and twelve months for other main components. Separately sold consumable nozzles have no warranty. Keep your receipt and serial number. You’ll need to submit a support request and work through troubleshooting, so allow for your own time as well as any parts bill.
Is The Kobra 3 Max Worth The Cost For You?
On September 5, 2026, Anycubic’s dedicated US store listed the original base printer at $349, the original four-color ACE Pro Combo at $499, and the eight-color Combo at $698, all without an added filament bundle. The base and original Combo pages advertised dispatch within 24 hours. Mainland US shipping is listed as free; tax is extra, and remote-area shipping depends on the address.
The extra $150 for the four-color Combo over the base printer is worthwhile if you’ll use color, drying or spool backup regularly. For single-color props you plan to paint, I’d save that money for filament. Add a compatible camera if monitoring matters, and budget for supports, purge waste and occasional failed prints. Before ordering eight colors, have the seller confirm the Max-compatible hub and all connection hardware are included.
Also consider the $569 Kobra 3 Max V2 four-color Combo, with no added filament bundle. Its listing specifies a full-metal hotend and ACE 2 Pro, with estimated shipping September 11–20. At just $70 more, I’d pause before buying the original Combo. The new hardware makes the V2 worth considering, although it doesn’t yet prove the V2 will perform better over the long term.
The original base printer is the better deal if you need its size, work mainly in PLA or PETG and can handle upkeep. If you lack the room, need an enclosure for your materials or can’t tolerate interruptions, choose a printer that meets those needs. A large, cheap printer only saves you money when it finishes the things you actually want to make.


