Creality K1 Max Review
Generally less than the K2 Pro; color accessories cost extra
Our verdict
I think it is worth considering for large, mostly single-color PLA and PETG projects when it costs substantially less than the K2 Pro. Its roomy enclosure and useful speed come with manual adhesion checks and maintenance; it suits a workshop better than a quiet shared room.
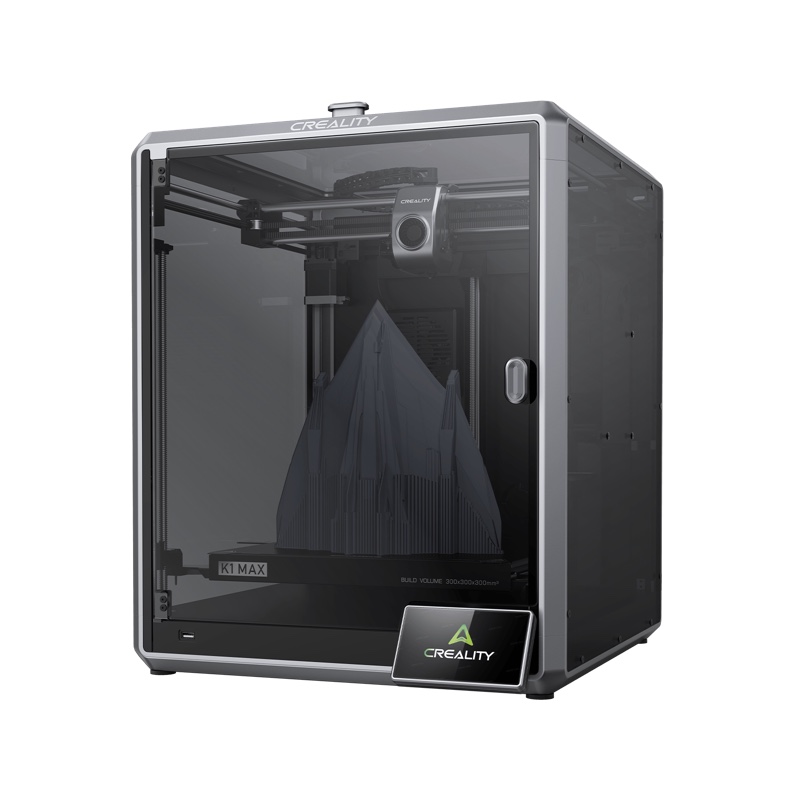
Best atLarge props, housings and workshop parts that benefit from printing in one piece.
Less suited toQuiet rooms, printing with minimal attention, or large parts that need controlled chamber heat.
The Key Specs
| Print area | 300 × 300 × 300 mmCheck the model in a slicer with room for supports and a brim. |
|---|---|
| Advertised speed | Up to 600 mm/s in lab conditionsReal job times depend on geometry, cooling and filament; heating and checks add time. |
| Automatic checks | Bed leveling, LiDAR and camera detectionCheck which functions are enabled and watch important first layers yourself. |
| Chamber | Enclosed, without a dedicated heaterThe enclosure retains warmth, but large ABS and ASA parts can still warp. |
| Material fit | Start with PLA or PETGTPU is possible at lower flow; filled blends need matching nozzle and drying requirements. |
| Printer size | 435 × 462 × 526 mm; around 40 lbUse a sturdy bench and leave extra space for the door, lid and rear spool. |
Which Version Should You Buy?
- Printer without color accessories
- Choose it for mostly single-color work. Confirm whether the seller supplies an original or 2025 machine before buying parts or upgrades.
- CFS-C color upgrade
- For automatic filament changes on a supported original or 2025 K1 Max. Confirm the complete hardware, firmware and filament requirements; the older CFS upgrade kit excludes the 2025 version.
Budget beyond the printer. Allow for filament, the glue specified for your plate, ventilation and eventual replacement nozzles or build plates. Filled filaments may need drying equipment and a compatible wear-resistant nozzle. Automatic color changes require additional hardware.
More Specs And Ownership Details
| Nozzle / bed | Nozzle rated to 300°C. Support specifications list a 120°C bed, while some sales tables say 100°C; confirm the supplied version before relying on temperatures above 100°C. |
|---|---|
| File transfer | USB flash drive, Wi-Fi or Ethernet. USB printing needs no cloud account; verify local transfer and camera access during setup if avoiding the cloud matters. |
| Revisions / spare parts | Older separate nozzles and later integrated Unicorn nozzles are not interchangeable across all hotends. Match parts and firmware to the installed hardware. |
| Noise / placement | Reported testing found fans and fast movement intrusive beside a desk or television. Plan a ventilated workspace. |
| Color material limits | The CFS-C specification lists Hyper PLA, CR-PLA and CR-Silk; its listed material range is narrower than the printer’s. Confirm support before buying. |
| Routine care | Clear debris, follow the manual’s lubrication schedule and use the matching service procedure for jams or nozzle replacement. |
I’d consider the Creality K1 Max if you regularly print large props, housings or workshop parts. It combines room for prints up to 300 mm in each direction with useful printing speed. If a part fits in one piece, you won’t need to print smaller sections and join them. Shorter print times can also mean less waiting between attempts when you’re getting a design right.
The catch is that its automatic checks don’t take all the work out of printing. You still need to get parts to stick, choose suitable settings and deal with maintenance. It’s also a poor fit for a room where you need quiet.
I’d consider it for mostly single-color projects that need the space. If automatic color changes or a heater for the enclosed printing area matter to you, compare the newer Creality K2 Pro before buying. Also check which K1 Max you’re getting: the current US listing names a 2025 version, and older printers don’t share every upgrade requirement.
What The K1 Max’s Extra Room Lets You Print
The K1 Max’s maximum print size is 300 × 300 × 300 mm, or roughly 11.8 inches in each direction. That’s useful for wide enclosures, larger costume pieces and several small parts arranged on one plate. It doesn’t mean every adult helmet will fit.
Check whether your model fits before deciding. A slicer is software that turns a digital model into instructions for the printer. Open your model in it, choose the K1 Max and set the model to the size you need.
The preview lets you check the space it needs, including supports that hold up parts during printing and are removed afterward. Allow for any brim, too—a thin border printed around the base to help it stay attached. Rotating a piece can help it fit, but may leave more surfaces needing support and cleanup.
A reported test on an early K1 Max shows what fits: a life-size skeleton foot took 10 hours and 19 minutes using Hyper PLA plastic filament and default settings, with each printed layer 0.28 mm thick. The printer had room for the whole foot, although a whole skeleton still required separate pieces.
If everything you want to make is small, though, unused space doesn’t improve the finished parts.
The printer itself measures 435 × 462 × 526 mm—about 17.1 × 18.2 × 20.7 inches—and weighs around 40 pounds. You’ll need a sturdy bench with more room than those dimensions suggest: leave space to open the front door, lift the lid and reach the rear spool holder. On the original single-color setup, the sensor that detects when filament runs out is near that rear holder, so loading is awkward with the printer pushed against a wall.
How Fast The K1 Max Prints At The Quality You Need
Creality advertises a maximum printing speed of 600 mm/s, achieved in a lab using a special slicer mode and 0.1 mm layers. That doesn’t mean every part prints at that pace.
Small features, corners, cooling and the amount of plastic the nozzle can melt all affect the job. Heating and calibration also add time before the model starts.
The reported results below come from early K1 Max printers, not retests of the 2025 version.
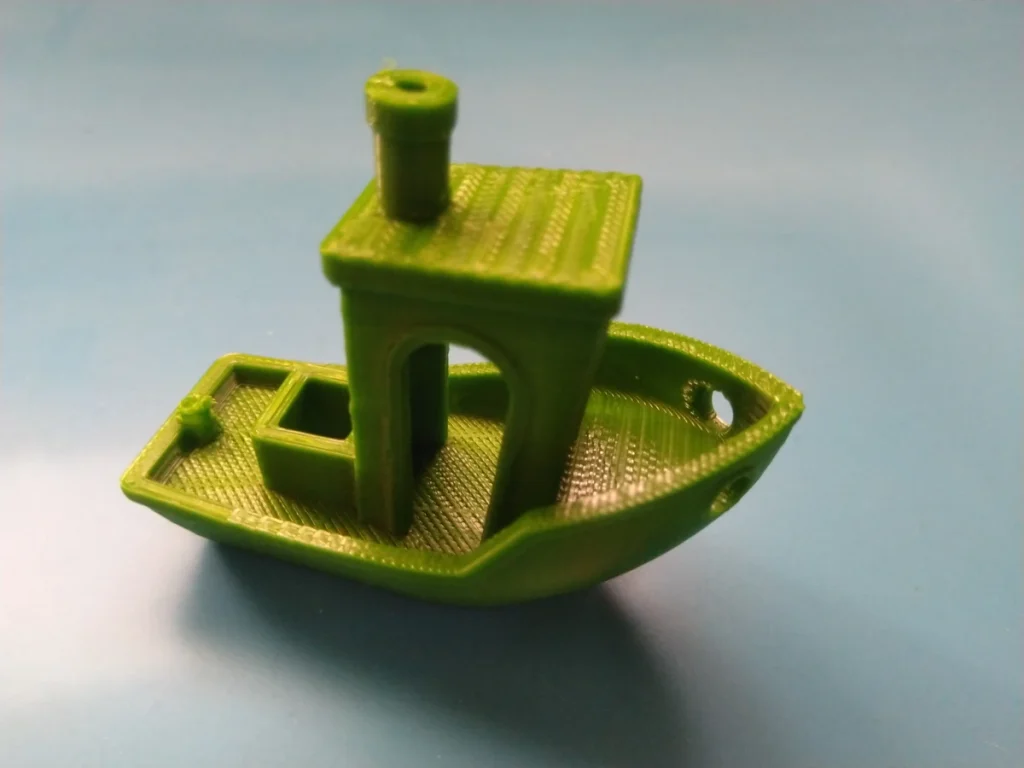
A reported Benchy test—the small boat often used to check printer performance—finished in 17 minutes and 38 seconds using ordinary Inland PLA. Its settings were a 300 mm/s default speed, 0.25 mm layers, two walls, three top and bottom layers, and 10% infill, the supporting structure inside the print. Combing and Z-hop, settings that affect nozzle travel between printed areas, were disabled.
The result had even layers, and sections that extended out over the layers below printed well.
That’s a quick result, but you shouldn’t expect the same time from every boat file or a detailed display model. A separate test produced the supplied demonstration boat in 16 minutes but needed at least 25 minutes after preparing a boat file in the slicer. A supplied demonstration doesn’t tell you how long a model will take with your chosen settings.
Allow for preparation, too. Another early test reported roughly four minutes of checks before printing, outside its quoted print time. Those checks add proportionally more time to a tiny replacement clip than to a large part.
For a long, unfamiliar job, I’d allow time for calibration to check the bed and adjust filament flow before committing hours to the print.
You may need to adjust the printer to get a clean surface. One early test showed surface ripples, called ringing, with the printer as supplied; these improved after a software fix. Other early testing found clean output without extra tuning. Good results are possible, but these reports don’t show that every hardware and software version will produce the same finish.
Parts that need to fit together deserve a separate check. In one reported test, a feature designed to measure 25 mm came out at 24.88 mm along the X axis and 24.73 mm along the Y axis, the printer’s two horizontal directions. All the reported measurements of features from 5–25 mm were smaller than intended.
The test didn’t give enough detail about the filament and slicer settings to say how closely your parts will match their intended dimensions. Those small-feature measurements also can’t predict the error across a 300 mm part.
If you’re printing a lid, bearing seat or sliding joint, print a small section of the connection first. Check it against the real part before committing to the full model. That gives you a useful answer about your filament and settings without spending hours on a housing whose lid won’t close.
For display pieces, inspect curves, corners and supported undersides before chasing shorter times. The K1 Max can make quick, attractive prints, but I’d trade some speed for a cleaner visible surface. A part that needs extensive sanding—or another attempt—hasn’t saved you much time.
How Much Setup The K1 Max Leaves To You
The K1 Max arrives largely assembled. Before letting the print bed move, remove the packing and shipping screws that hold it in place. Setup also includes fitting the supplied external components and running the guided checks. Follow the instructions for your version rather than assuming an older unboxing video matches every detail.
You’ll still need to load the filament yourself. Early hands-on testing found the guide tube and its securing clip fiddly to handle, so allow yourself time to learn the procedure. Follow the loading instructions, using the screen’s Extrude command to feed plastic through the heated nozzle. Check that plastic actually emerges before starting your first model.
The automation handles three different jobs:
- Bed leveling measures height differences across the printing surface so the printer can keep the nozzle at the right distance from the plate. It doesn’t clean the plate or make every material stick.
- LiDAR, a laser scanner, reads printed calibration lines so the printer can adjust filament feeding as printing speed changes. This helps avoid bulges or gaps at corners. It can also inspect the first layer for missing areas or lifting. It isn’t the camera watching the rest of the job.
- Camera detection looks for objects left on the bed and the tangled strands that can appear after a print fails. Detection and automatic pausing are settings you should check separately.
Don’t assume those functions are all enabled. Creality’s AI instructions describe settings that need manual activation, and its documentation acknowledges that detection isn’t completely accurate. Early testing also produced false alarms on an empty bed and an acceptable first layer.
Check the print yourself before dismissing an alert, and watch the first layer of an important job rather than depending on a warning later.
You’ll also need to keep prints stuck to the plate. Early printers were tested with a smooth flexible plate and instructions to apply glue. In one reported test, the print came loose where glue hadn’t covered the print area. Follow the cleaning and glue instructions for the plate you receive; don’t assume a textured replacement plate sold separately will be included.
After printing, let the plate and part cool, then remove the flexible sheet and bend it gently to release the model. Don’t sharply fold the sheet or force a stubborn part off while everything is hot.
Which Materials And Rooms Suit The K1 Max
PLA, the common choice for models and general hobby prints, is a sensible starting point. Reported tests also produced good parts in PETG, another type of plastic filament. For either material, start with the matching profile—the slicer’s preset print settings—and check a small print before filling the plate. When a part needs to withstand heat or carry a load, choose the filament for that requirement rather than assuming any printable plastic will do.
Flexible TPU filament is also possible, but it doesn’t print as fast as PLA. A successful early test with Inland rainbow TPU used the default TPU setting, which limited the amount of plastic passing through the nozzle to 3.5 cubic millimeters per second (mm³/s). That was far below the PLA setting, so don’t expect the same speed with soft filament.
The nozzle is rated to 300°C. Creality’s K1 Max support specifications give a 120°C print bed limit, although some sales tables still say 100°C. For a material that needs a bed temperature above 100°C, confirm the limit for the exact printer supplied. Reaching the required temperature doesn’t guarantee that a large part will print well.
Plastics such as ABS and ASA benefit from the enclosure holding warmth around the print. If they cool too quickly, shrinking layers can pull the corners off the plate. The K1 Max has no dedicated heater for this chamber, though.
In reported tests of large prints using high-temperature materials, corners still lifted from the plate despite glue and a brim. If large ABS or ASA parts are your main goal, the K2 Pro’s chamber heater is a good reason to consider it instead.
For low-temperature materials such as PLA, Creality says to remove the top cover when room temperature exceeds 30°C. Excess heat inside can soften PLA in the feed path before it reaches the nozzle, causing a jam. Removing the cover lets heat escape and reduces that risk.
Carbon-filled filament needs a wear-resistant nozzle that fits your hotend, the assembly that heats and melts the plastic. Check the filament maker’s requirements for nozzle size, temperatures and drying as well. A compatibility list doesn’t prove that every nylon or carbon-filled blend will work with the parts already installed.
Reported testing found the fans and fast movement noisy enough to be intrusive beside a desk or television.
The printer’s carbon filter also isn’t proof of protection from printing emissions. Provide ventilation; where practical, use an extractor that captures emissions near the printer and carries them outdoors. Printing emissions include particles and gases, so less odor doesn’t mean both have been removed.
Sending Files And Maintaining The K1 Max
Creality Print is the straightforward slicer to start with. Choose the settings for your exact printer and nozzle, select your filament, then inspect the preview for supports, estimated time and material use. The official release list has reached version 7.2.1, so older guides may show a different interface.
You can transfer jobs with a USB flash drive or through your local network using Wi-Fi or Ethernet. Creality also documents local monitoring and control, including camera access. Creality Cloud adds an account-based route for sending and checking jobs over the internet. A cloud account isn’t needed to print a file from USB.
If keeping everything off the cloud is essential, check that local file transfer and camera access work during setup. Some early reports described linking the printer to a cloud account first, while manufacturer instructions also describe printing over a local network. These don’t establish whether every version of the printer’s software allows setup without a cloud account. USB is the clearest fallback if network setup gets in the way.
Firmware—the software running on the printer—also needs to match the hardware. Creality’s support page lists V1.1.0.27, but original, 2025 and color-upgraded configurations have different update requirements. Follow the update instructions for your version rather than choosing a download by its version number alone. Keep a copy of a working slicer project and its settings before changing things.
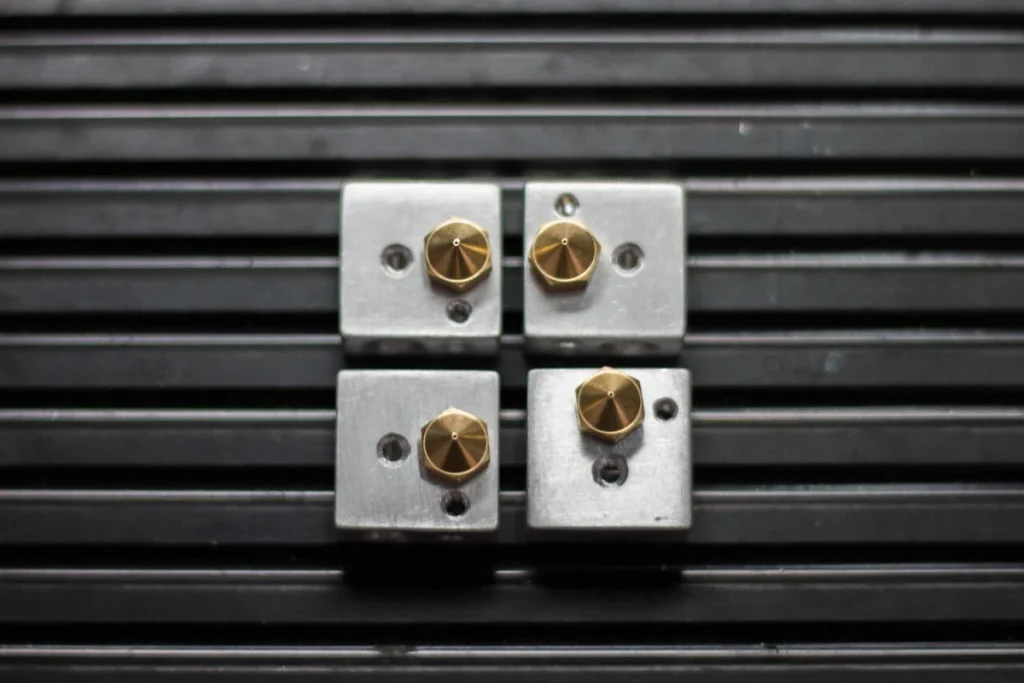
Check the installed hotend before ordering a replacement nozzle. Older K1 Max printers use a separate nozzle design; compatible later hotends take Creality’s integrated Unicorn nozzle. Those parts aren’t interchangeable just because both listings mention K1 Max.
Read the replacement’s compatibility notes and follow the matching service procedure, including its heating and power instructions. A nozzle change involves tools near delicate heater wiring.
If filament jams, start by identifying where it stops feeding: at the spool, in the guide tube, in the extruder that grips the filament, or in the heated nozzle. Creality publishes separate guides for clearing jams and replacing parts. These can help with repairs, but don’t tell you how often a new printer will fail. You’ll also need to clear debris and follow the manual’s lubrication schedule.
Parts listings include build plates, doors, heated beds and nozzle components. Support is available through tickets and email, with fault descriptions and photos or video used for diagnosis. That’s useful if you’re comfortable following instructions, but it doesn’t guarantee a repair turnaround.
Check which parts the warranty covers and for how long. The US store lists 12 months for the enclosed printer and three months for the extruder and hotend. Keep the receipt and packaging, and check the seller’s return conditions rather than treating a short return window as an unrestricted home trial.
When The K1 Max Is Worth Buying
I’d buy the K1 Max if you regularly need its larger print area, most jobs use one filament, and you’re comfortable checking that prints stick and doing occasional mechanical work.
I’d skip it if your available spot is beside your bed, you need a printer that demands almost no attention, or your projects fit comfortably on a smaller printer.
For automatic color changes, Creality lists the CFS-C, an add-on that holds four filament spools, as compatible with both the original K1 Max and K1 Max 2025. It requires additional hardware and matching firmware. The older CFS upgrade kit is a different system and explicitly excludes the 2025 version.
Don’t buy either accessory just because the listing says “K1 series.” Confirm that it supports your printer version and filaments, and that you’re ordering all the hardware you need.
The CFS-C specification lists Hyper PLA, CR-PLA and CR-Silk, with further material support dependent on updates. That is narrower than the printer’s own material range. US availability also needs checking: the CFS-C store listing showed it sold out.
The closest useful alternative is the K2 Pro. It has the same maximum print size, adds a heater that warms the chamber to as much as 60°C and includes a CFS system for automatic filament changes if you choose the Combo package. Reported testing found good multicolor output, though filament changes added time and produced waste.
Without color accessories, the K2 Pro generally costs more than the K1 Max. If color is essential, compare the cost of each printer with all the required accessories included.
For mostly single-color PLA and PETG projects, a K1 Max that costs substantially less remains worth considering. If the price difference is small, I’d favor the K2 Pro for its heated chamber and ready-made color option.


