Raise3D Pro3 Review
Base model costs less than the Pro3 HS; the Hyper Speed kit adds to the base cost.
Our verdict
I’d shortlist the Pro3 for functional prototypes and small batches when a workshop can handle calibration and routine maintenance. Its large print area and two-material capability are useful, but I’d ask for repeated samples of the intended job before relying on tight fits or soluble supports.
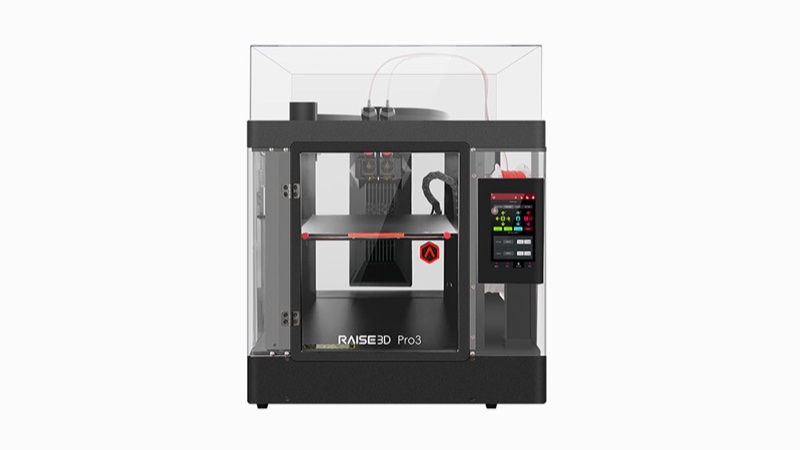
Best atLarge functional prototypes and two-material jobs in workshops with time for calibration and maintenance.
Less suited toWide dual-material parts, guaranteed tight tolerances from default settings, or teams without capacity for upkeep.
The Key Specs
| Print area | 300 × 300 × 300 mm single; 255 × 300 × 300 mm dualCheck the complete sliced job, including supports, brim and wipe wall. |
|---|---|
| Dual extrusion | Two nozzles move together; the idle nozzle liftsUse two materials or colors in one job; this is not a two-head system for printing duplicate parts simultaneously. |
| Nozzle / bed limits | 300°C / 120°CCheck the exact filament and hotend combination; temperature limits alone do not establish composite suitability. |
| Soluble supports | PVA+ workflow requires calibration and dryingBudget for an external dry box and demonstrate support removal on your own part. |
| Placement | 620 × 626 × 760 mm; 56.2 kgChoose a sturdy permanent position, arrange lifting help and allow door, lid and service access. |
| Hotend changes | Clamp-release, replaceable modulesRun Z-probe offset calibration after replacement; a swap still takes setup time. |
Which Version Should You Buy?
- Base Pro3
- Choose it when the standard build height fits and your priority is developing a repeatable printing process.
- Pro3 with Hyper Speed kit
- Consider it when faster production matters, after comparing acceptable parts on the same job; confirm the kit is included in your quote.
- Pro3 Plus
- Choose the taller sibling when you need its 605 mm build height.
- Pro3 HS
- Compare this newer, more expensive model for faster engineering-material work; its revised hardware is not the same as adding the kit to a base Pro3.
Budget beyond the printer. Allow for filament, support and wipe-wall waste, drying equipment, filters, replacement hotends and build surfaces, and operator time. Include shipping and tax in the full quote. Confirm who handles diagnosis and repairs with the seller.
More Specs And Ownership Details
| Setup | Five-step offset calibration covers both Z-probe offsets, bed leveling, right-nozzle XY alignment and a dual-color cube. |
|---|---|
| Software / connection | Free ideaMaker slicer; USB job transfer, Wi-Fi and Ethernet, with camera monitoring and RaiseCloud. |
| Job safeguards | Filament-runout detection and power-loss recovery; inspect a resumed part before accepting it. |
| Maintenance | Daily checks plus checks at 400 and 800 printing hours; these are inspection intervals, not component lifetimes. |
| Hyper Speed kit | Includes two high-flow hotends, a frequency calibrator, software upgrades, activation for one printer and Hyper Speed PLA and ABS. Match firmware to the installed configuration. |
I’d consider the Raise3D Pro3 if your workshop needs an enclosed printer for large parts, you want to print with two materials, and someone can take care of the printer. At its September 5, 2026 US listing price of $2,999, the base model is worth considering. The Hyper Speed upgrade is listed separately, so check the package before comparing quotes.
I’d shortlist it for functional prototypes and small batches, but ask for proof that it can meet your dimensions and print with your chosen support material before buying. A good-looking print doesn’t guarantee that parts fit together, and convenient hardware doesn’t remove the need for calibration. If your main priority is faster engineering-material production, the newer Pro3 HS is the closest useful alternative to evaluate alongside it.
Where The Base Pro3 Fits In Your Workshop
The Pro3 offers a 300 × 300 × 300 mm working volume with one extruder. Using both reduces the width to 255 mm; depth and height remain 300 mm. That difference matters for a wide enclosure or fixture that needs soluble supports—supports you can dissolve after printing. A part that fits when printing with one material may need turning, splitting or a different printer when using two.
Check the prepared print job, including the brim around its base and any structures added to catch unwanted material. The outer dimensions of your CAD model alone won’t tell you whether the whole job fits. For example, a 280 mm-wide housing won’t fit across the dual-extrusion width in that orientation. Turning it may help, but can change which surfaces need support and how the layers run through the part.
The machine itself measures 620 × 626 × 760 mm, roughly 24.4 × 24.6 × 29.9 inches. Raise3D’s current specification gives a net weight of 56.2 kg, or 123.9 pounds. Choose a sturdy, permanent spot and arrange help to move it. Leave room to open the front and side doors, remove the lid and reach the parts inside. You’ll need more space than the printer’s dimensions suggest.
Check which model you’re ordering. The Pro3 Plus extends build height to 605 mm. The Hyper Speed kit upgrades a Pro3 or Pro3 Plus. The newer Pro3 HS family has additional hardware changes, including revised hotends and couplings; installing the kit doesn’t turn a base Pro3 into an HS.
How I’d Judge The Pro3’s Print Quality
Surface Finish And Usable Materials
I’d judge the Pro3 by the useful parts and material combinations it can support, while allowing for maintenance and interrupted jobs. An independent test of the base Pro3 reported clean PLA details, successful ABS utility parts and a well-finished PC bevel gear. A TPU gasket printed successfully after a jam that required taking the printhead apart. The test’s PLA speaker project used multiple printed parts and totaled 140 printing hours. An initial motor-driver voltage fault caused a failed run, followed by successful reprinting.
When you check a printed part, ask three questions: does it look right, does it fit, and can it handle the load you need it to carry? A smooth gear can satisfy the first question without answering the other two. If your part needs to handle a particular load or temperature, ask for tests that show it can. Printing successfully doesn’t prove the material is suitable for the job.
The base machine’s nozzle limit is 300°C and its bed reaches 120°C. Raise3D lists PLA, ABS, ASA, PETG, PC, PETG ESD, TPU 95A and PVA+ in the current specification. Those limits and named materials are more useful than a sweeping claim that it prints engineering plastics.
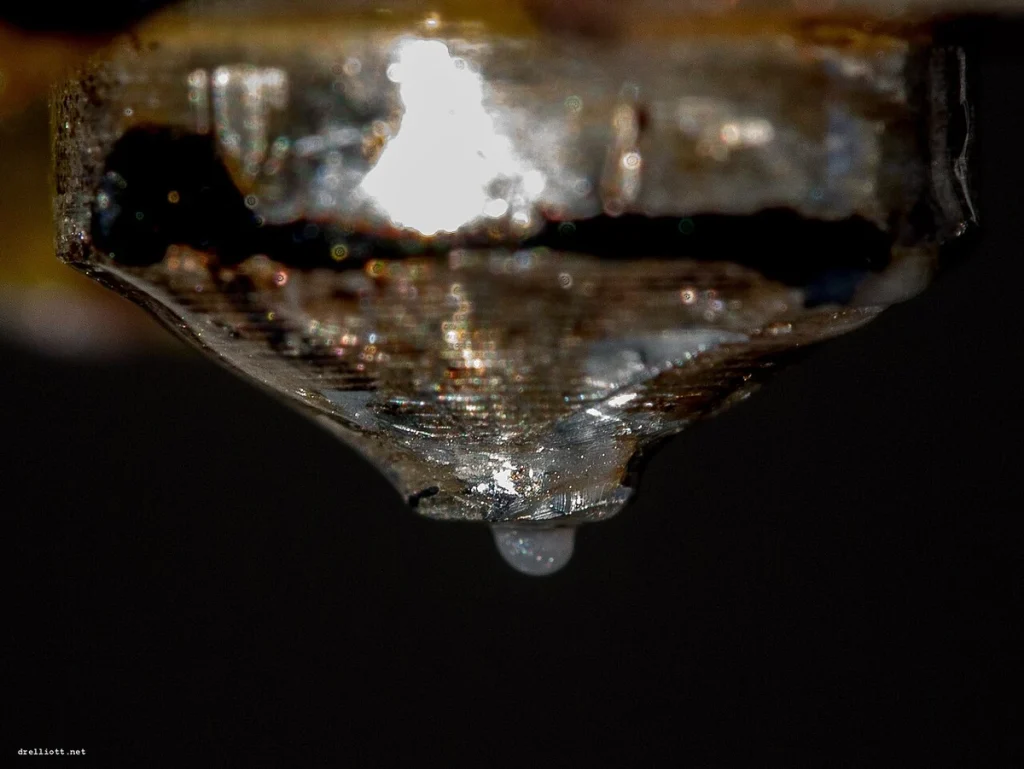
If you’re using abrasive filament, check that your nozzle and print settings are suitable for it. The current V3H replacement-hotend listing names specific compatible filaments. It doesn’t show how well the hotend holds up over time when printing carbon fiber. An enclosure and a high enough temperature limit alone don’t prove it can handle a demanding composite job.
Dimensional Accuracy And Repeatability
The same independent test reported a mean dimensional offset of 0.240 mm and an average standard deviation of 0.033 mm when printing circles. Larger circles showed greater error. The suggested correction to dimensions in the X and Y directions wasn’t followed by a documented retest. A separate test of how consistently it printed to size produced 150 pieces and measured 16 selected samples, reporting a statistical score called Cp (process capability index) of 7.56.
The offset tells you how far the measurements were from the intended size; standard deviation tells you how much they varied. The measurements can be close to each other and still be the wrong size. For a hypothetical ±0.10 mm drawing tolerance, a 0.24 mm error would fail, regardless of surface quality. That illustration isn’t a universal Pro3 tolerance rating.
A high Cp score doesn’t guarantee the parts will fit. It compares how much the sizes vary with how much variation is allowed, but doesn’t check whether the average size is right. A related score, Cpk, also accounts for how far the average is from the intended size. Cp alone can’t tell you how many parts will fail in production.
For parts that need to fit together, request repeated samples with your hole sizes, bearing seats and longest critical dimensions. Measure after cooling, using the intended material and orientation. Accept a size-correction setting only after those features pass again; don’t assume one correction fixes every shape.
How Useful Is The Pro3’s Dual Extrusion?
The Pro3’s two nozzles move together, and the inactive nozzle lifts electronically to keep it clear of the print. It isn’t an independent dual-extruder system with two separate moving printheads that can print two copies at once. The benefit is that you can use different materials or colors in one job.
Changing a hotend is mechanically straightforward: you release a clamp and slide the module out horizontally. However, Raise3D requires Z-probe offset calibration after replacement. Allow time to unload the filament, swap the hotend and calibrate it when planning a material change.
Supports hold up parts of your print and are removed afterward. Some are hard to reach and remove with tools. This printer can use supports that dissolve, which could make them easier to remove. Raise3D provides instructions for using PVA+ with PLA, PETG and PA, and its prepared settings put PVA+ in the right extruder. The procedure requires nozzle-height and XY-offset calibration. It also calls for drying and an external dry box during printing. Don’t count on the internal spool compartment to dry your filament or replace that setup when budgeting.
There are costs beyond the second spool. Raise3D’s dual-printing guide describes cooling the idle nozzle to reduce drips, which increases printing time, and adding a wipe wall to catch unwanted material. That wall consumes filament and space. Lifting the idle nozzle doesn’t, by itself, ensure the materials stay separate or the nozzles line up correctly.
The independent test’s multicolor clamp and speaker were assembled from separate prints, so they don’t show material switching during a print.
There’s still no documented independent test of soluble supports on the base Pro3 that measures alignment, waste, removal time and success across repeated prints. If soluble supports are your reason for buying, ask for a demonstration using your part. Check the surface after support removal and the total time needed. That way, you can see whether dissolvable supports are worth the extra time and money.
Running And Maintaining The Pro3
Setup, Slicing And Job Monitoring
The startup wizard guides you through configuration and a five-step offset calibration covering both Z-probe offsets, bed leveling, right-nozzle XY alignment and a dual-color cube. Raise3D estimates about an hour for that calibration process. Automatic mesh leveling therefore doesn’t mean you can skip nozzle setup.
ideaMaker is Raise3D’s free slicer, with material templates and more detailed settings as needed. You can transfer jobs directly by USB, or use Wi-Fi, Ethernet, the camera and RaiseCloud to connect and manage the printer remotely. Filament-runout detection and power-loss recovery are included. Treat recovery as a chance to save a job, then inspect the resumed part before accepting it.
On September 5, 2026, Raise3D’s download center listed ideaMaker 5.4.2 for Windows, macOS and Linux. Its published requirements include 64 GB RAM and 8 GB graphics memory, so have IT check whether your workstation meets the current requirements before installing it. These are published requirements, not measured resource use for a typical Pro3 job. Firmware downloads also distinguish stock and Hyper Speed configurations; use the version that matches your installed hardware.
The HEPA and activated-charcoal filter doesn’t prove that exposure to emissions is safe in your room. Plan ventilation around the material and workload: NIOSH recommends ventilation controls for printer emissions.
Calibration, Repairs And Support
Raise3D lists daily checks and additional maintenance checks at 400 and 800 printing hours. These cover the build plate, hotend, nozzle, motion components, extruders and other parts. Those intervals tell you when to inspect the parts; they don’t promise how long the parts will last.
Put someone in charge of those checks and save the print settings that have worked for each approved job. After repairs or firmware changes, print and check a test part again before approving another batch. A written procedure matters especially when several people share the printer.
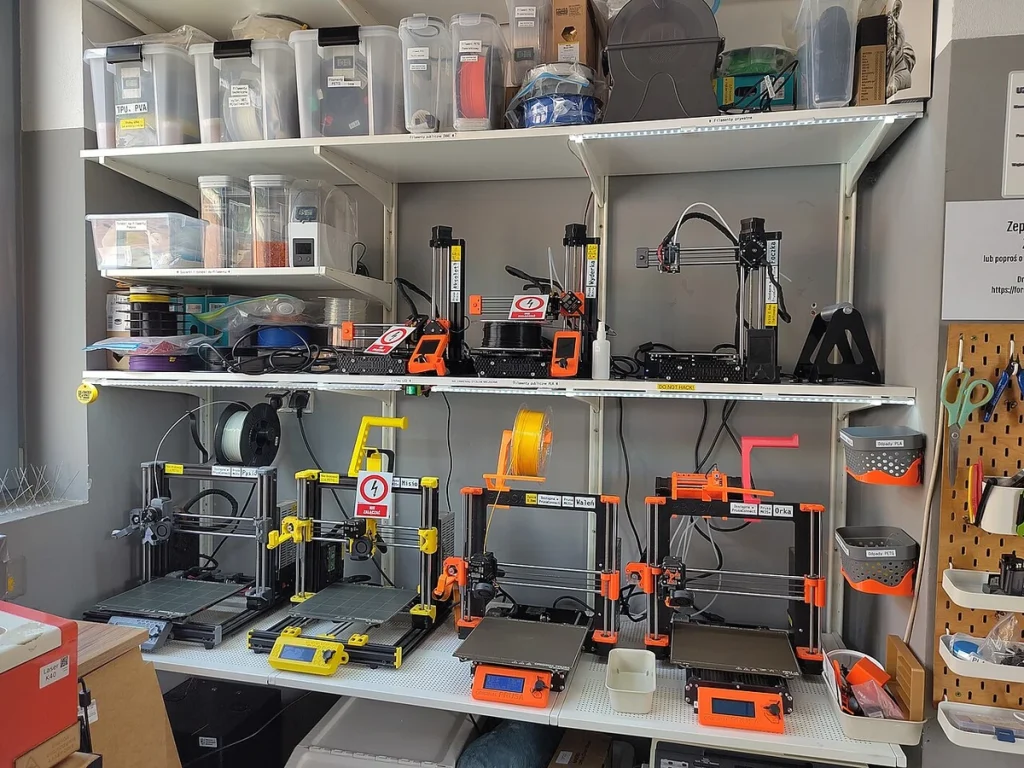
The reported repairs don’t show that the base Pro3 has a recurring defect or tell you how much of the time these printers are available for work. Successful retries don’t establish either. Before buying for production, get clear support terms: who diagnoses the fault, who installs parts, and what repair turnaround the seller commits to. Public repair instructions are useful, but they aren’t an on-site service agreement.
Pro3 Purchase Costs And Production Value
On September 5, 2026, Raise3D’s US store offered the base Pro3 for $2,999 before tax, with an add-to-cart option. The Hyper Speed kit appeared as a separate $399 accessory. Shipping wasn’t quoted on the product page, and printers are excluded from the store’s general free-shipping offer. The listing lets you place an order, but doesn’t confirm warehouse stock or a shipping date. Ask for a full quote covering the base printer, accessories, tax, shipping and estimated dispatch date.
Adding the separately listed kit brings the hardware subtotal to $3,398. It includes two 0.4 mm high-flow hotends, a frequency calibrator, software upgrades, an activation code and 1 kg each of Hyper Speed PLA and ABS. Activation applies to one printer. Follow the firmware requirements in the instructions; installing the kit takes more than changing the speed in your slicer.
Don’t assume offers in other regions apply to that US price. The main series page displays a euro-denominated free-kit offer, while the US store lists the kit separately. Get the package contents in writing so you know which offer you’re getting.
Replacement parts listed on September 5 cost $129.99 for a V3H hotend assembly and $89.99 for a flexible plate with BuildTak. Those are prices for individual parts, not estimates of yearly maintenance costs. Filament, support waste, drying equipment, filters and operator time also belong in your budget.
The US warranty provides 12 months from the invoice date, with substantial exclusions after first use, including hotends, nozzles, build surfaces and plates. An additional year of Pro3 RaiseShield coverage is listed at $800 and excludes consumables. Extended coverage doesn’t mean every repair cost is included.
There’s no verified timed comparison showing the cost per acceptable part for a stock Pro3 versus an upgraded one. Advertised motion speed can’t fill that gap. Compare the total time using the same material, part, layer height and quality requirements. Include setup, support removal and rejected prints.
The Pro3 HS is currently listed at $4,599 before tax—$1,201 above the base-plus-kit subtotal. Its revised hardware and advertised ability to print composites at high speed make it worth comparing sample prints if you need to produce engineering-material parts faster. You need that comparison to know whether paying more gets you more usable parts.
Should You Buy The Raise3D Pro3?
I’d shortlist the Pro3 at the current price if your prototypes fit its usable print space, you want to print with two materials, and someone in the workshop can handle calibration and routine maintenance. Its size, documented instructions for different materials and replaceable hotends are useful if you want to develop a printing process you can repeat reliably in your workshop.
Pass if your part needs supports printed with the second nozzle, exceeds the 255 mm dual-extrusion width and can’t be turned or divided. Also pass if the purchase depends on guaranteed tight tolerances straight from default settings, proven unattended uptime, or maintenance that your team has no capacity to perform. Those are requirements to establish before ordering.
Before buying, send the seller one representative job that includes the most demanding parts to fit together and support during printing. Specify the exact filament, hotends, stock or upgraded configuration, orientation and acceptance limits. Request repeated samples, the saved slicing profile, total elapsed time, material consumption and a record of any adjustments or repairs needed. Include support removal in the demonstration when it matters.
Buy when those samples meet your requirements and the full quote leaves room for running costs. If speed with demanding materials is the sticking point, compare the Pro3 HS on that same job. The base Pro3 can make sense for your workshop if it produces parts that meet your requirements and your team can manage the cost and work involved.


