Bambu Lab P2S Review
Upper mid-range · Combo costs more
Our verdict
I see it as a good first enclosed printer for everyday models and useful parts. Choose it for easier setup and maintenance; keep a working P1S if you are already happy with its prints.
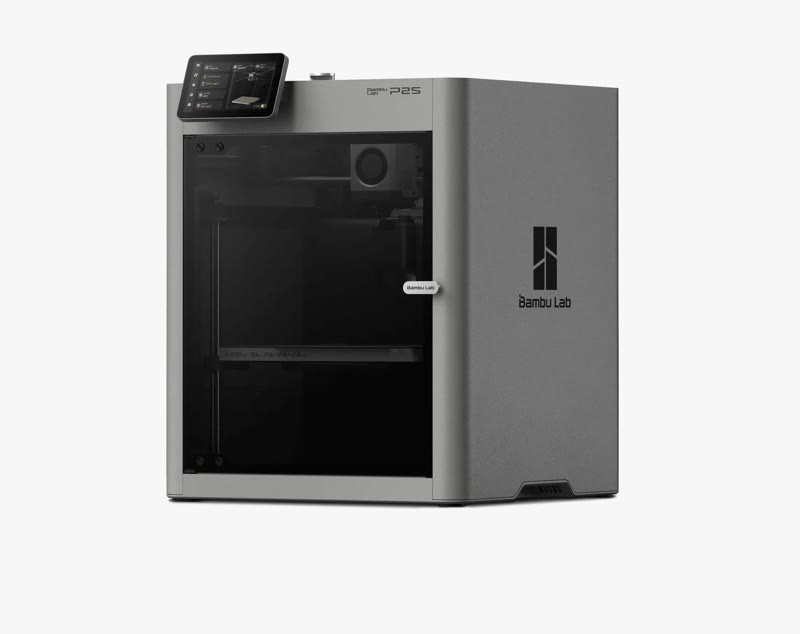
Best atEveryday PLA and PETG printing with less manual setup.
Less suited toLarge parts that need controlled chamber heat, or multicolor jobs where discarded filament matters.
The Key Specs
| Print area | 256 × 256 × 256 mmAllow room for supports and borders. |
|---|---|
| Chamber heating | Enclosed, without a separate heaterThe bed warms the chamber; you cannot set its air temperature. |
| Material fit | Start with PLA or PETGABS and ASA need suitable settings and ventilation. Feed ordinary soft TPU from an external spool. |
| Color printing | Four spools with the Combo’s AMS 2 ProOne nozzle clears out the previous filament at each color change. |
| Printer size | 392 × 406 × 478 mmBody only; leave extra room for the spool, door, lid and discarded plastic. |
Which Version Should You Buy?
- Standalone
- Costs less. Choose it for mostly single-color prints and manual spool loading.
- Combo
- Adds one AMS 2 Pro. Choose it for automatic color changes, matching backup spools and heated filament drying.
Budget beyond the printer. Allow for filament and ventilation. Drying during a print also needs an external AMS 2 Pro power adapter and supported firmware; drying temperature is reduced.
Also consider: Bambu Lab X2D. Costs more, but adds a second nozzle for support material and a separate chamber heater.
More Specs, Drying And Warranty
| Frame | Enclosed CoreXY. |
|---|---|
| Nozzle / bed | Hardened-steel nozzle, up to 300°C; bed up to 110°C. |
| Setup / camera | Automatic calibration, five-inch touchscreen and 1080p camera. |
| Offline printing | USB or LAN-only printing; LAN-only mode gives up Bambu Handy cloud access. |
| Drying while printing | P2S firmware 01.02.00.00 or later plus the external AMS 2 Pro power adapter. One unit can dry from printer power while idle. |
| Noise / placement | Fans and movement remain audible. Choose a ventilated workspace away from sleeping areas; an enclosure does not replace ventilation. |
| US consumer warranty | Two-year limited warranty for consumer purchases directly from Bambu’s US store. Normal wear is excluded; manufacturing defects are treated separately. Reseller and business terms need checking. |
I’d consider the Bambu Lab P2S if you want your first enclosed 3D printer to handle everyday models and useful parts without a long setup project. It uses filament, plastic supplied on spools. Its touchscreen, automatic calibration and simpler nozzle changes reduce the work you have to do yourself. Reported prints show good results with PLA and PETG, the plastics many people start with.
Easier printing doesn’t automatically mean better finished parts, though. If your P1S already makes what you need, the P2S is a harder purchase to justify. You don’t get a bigger print area or a separate heater for the air around your model. And adding the Combo’s automatic filament feeder doesn’t remove the time and plastic wasted when switching colors.
I’d choose the standalone P2S for mostly single-color work. The Combo includes one AMS 2 Pro, an automatic feeder that holds four spools of filament. It’s more useful when you regularly change filaments, want the printer to switch to a backup spool or plan to print in several colors.
Getting Your First Print From The P2S
Measure where the printer will go. The body measures 392 × 406 × 478 mm, roughly 15.4 inches wide, 16 inches deep and 18.8 inches tall. You’ll also need room for the side spool, the opening door, access from above and a container behind the printer to catch discarded plastic. An AMS on top needs space above it to open its lid.
Leave enough room to reach the rear for loading and maintenance, and keep the air openings clear. Consider noise and ventilation before deciding it belongs beside your desk.
Inside, the stated print area is a 256 mm cube, about 10.1 inches in each direction. That’s useful for organizers, brackets, toys and sections of larger props.
It isn’t a promise that every 10-inch model will fit. How you position it matters, and temporary supports that hold up parts during printing need room too, even though you remove them afterward. Any extra border printed around the base also takes up space. If your prop is too big to print in one piece, you’ll need to print it in smaller parts and put them together.
Reported setup accounts describe a mostly assembled printer. Setup includes removing the shipping restraints, installing the screen and connecting the parts that feed filament into the printer. It then calibrates automatically, adjusting for the nozzle’s distance from the printing surface and the printer’s vibration. The five-inch touchscreen makes those steps easier to follow than the P1S’s small button-operated display.
To prepare your own models for printing, start with Bambu Studio. This desktop program, called a slicer, turns a model into instructions for the printer. Select the P2S and open a few models you want to print to check whether they fit before buying.
When preparing a print, also choose your filament and a suitable print profile—a saved set of printing settings. Use the preview to check where the printer will place plastic layer by layer before sending the job. You’ll still need to learn when a model needs supports and when filament needs drying.
The Print Quality And Speed You Can Expect
For decorative models, the P2S’s reported results are encouraging. PLA prints have shown clean detail and consistent layers, while PETG has also worked well with ordinary print settings. Expect visible layer lines, though. This printer builds objects from thin strands of melted plastic, so a smooth-looking photograph doesn’t mean the surface feels like a molded product.
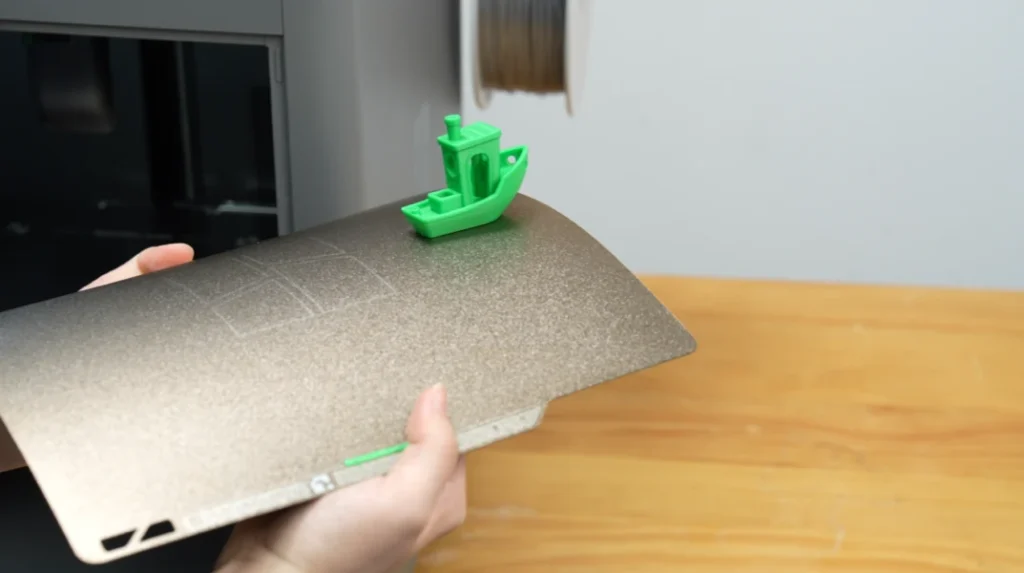
One reported print shows how long a substantial job can take: a two-section game board in Bambu PETG-CF, a carbon-fiber-filled PETG, took 20 hours and finished cleanly. It used 0.2 mm layers, default speeds and 15% gyroid infill—a curved pattern of plastic inside the part. That time applies to this model and those settings; a fast-moving printhead doesn’t make every project quick.
The advertised 600 mm/s maximum isn’t an average printing speed. Short movements, cooling pauses, calibration and filament changes all affect elapsed time. Use Studio’s estimate to plan your own job, but leave some margin. Don’t compare that estimate with another printer’s measured time on a different model.
For parts that fit together, small differences in size matter. One reported test measured features between 5 and 25 mm across the width and depth of printed parts, the X and Y directions. The measurements differed from the intended sizes by 0.15 mm on average, counting both oversized and undersized results as errors.
Details about the material, settings and repeated tests weren’t sufficient to make that a general accuracy guarantee. It also doesn’t establish that the P2S makes parts fit together better than a P1S.
If you’re making a lid, sliding joint or screw hole, print the small area where the pieces meet before committing to the whole object. That tells you whether your particular design and filament leave enough room for the parts to fit together. A good result on a decorative model can’t answer that question.
Automatic flow calibration helps adjust how plastic comes out of the nozzle as it speeds up and slows down. It can save you some manual adjustment to get neat corners, but it doesn’t remove every surface defect.
In one reported test, faint vertical bands appeared on flat sides at 60 mm/s and largely disappeared at 80 mm/s. Slowing down isn’t always the cure for a rough-looking side of a print.
The P2S can keep the area around a print warm, which helps with plastics such as ABS and ASA, but it has no separate heater to control that air temperature. A reported test in a 21–23°C room, at around 30% humidity, reached roughly 50°C inside the enclosure, or chamber, using heat from the printing bed. That result applies to those conditions; 50°C isn’t a chamber temperature you can set on the P2S.
The same testing found corner lifting with polycarbonate and severe curling with nylon before adding a brim, an extra printed border that helps hold the base down. Small successful parts don’t establish that large, flat parts in those materials will behave equally well.
Fiber-filled filaments can wear down the parts they pass through. The P2S’s hardened-steel nozzle and filament-feeding gears suit these abrasive materials, but check the particular filament’s nozzle requirements.
TPU, a flexible plastic, needs separate attention: ordinary soft TPU doesn’t belong in the AMS 2 Pro. Follow the instructions for feeding that TPU from an external spool; specially labeled TPU for AMS is a different option. Neither tougher hardware nor an enclosure makes every plastic equally easy to print.
What The P2S Combo Adds To Your Prints
The Combo’s AMS 2 Pro lets you keep several compatible filaments loaded, select them in Studio and let the printer handle changes. Its Auto Refill setting can switch to a backup spool when one runs out. That’s a reason to consider the Combo even if you rarely print anything colorful.
For Auto Refill, the two spools must match in brand, material type, color and nozzle temperature in the filament settings. Enter those details accurately and enable Auto Refill before the job. If no matching spool is available, the printer asks you to replace the empty one.
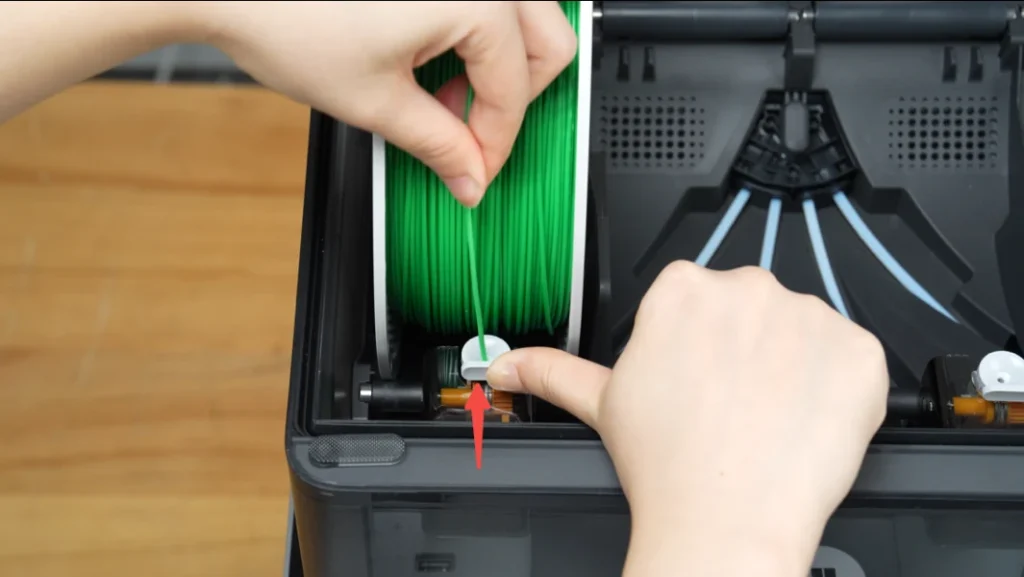
You don’t have to buy Bambu filament. Its tagged spools make identification easier, while other brands require you to enter the material and color yourself.
Physical fit matters too. The AMS 2 Pro specifies spools 50–68 mm wide and 197–202 mm in diameter. Bambu recommends plastic spools; cardboard may need suitable adapter rings. Check the spool’s diameter with the rings fitted, rather than assuming any one-kilogram roll will work.
The enclosed AMS 2 Pro also dries filament using heat. Some filaments absorb moisture from the air, which turns to vapor in the hot nozzle and can leave unwanted strands or holes in a print. Drying helps prevent those defects.
Being able to feed a filament doesn’t mean the AMS can fully dry it. Some plastics need a higher drying temperature than this unit’s 65°C maximum, so choose drying equipment to suit your filament.
One AMS 2 Pro can draw power from the P2S for drying while the printer is idle. Section 8.3.1, “Filament Drying,” in the P2S user manual explains how to select your material on the printer’s filament page and apply its saved drying settings.
To dry while the AMS feeds a print, use P2S firmware 01.02.00.00 or later and Bambu’s external AMS 2 Pro power adapter. Without that adapter, drying prevents the P2S from heating, moving or loading filament, so plan to dry between jobs.
During printing, the system lowers the drying temperature to keep filament from softening and being crushed by the feed gears. Bambu gives examples of 45°C when PLA is being printed and 55°C for PETG. Don’t expect full-temperature drying while printing; follow the settings for every filament inside the AMS.
For a separate hotter drying cycle, remove low-temperature filaments such as PLA and TPU before drying ABS or PETG. Otherwise, the softer filament can deform even if it isn’t the spool you’re trying to dry.
Color changes add time and waste. The P2S uses one nozzle for all colors, so it must clear out the previous plastic each time it changes color.
A reported multicolor baby-dragon print took about 19 hours and left a substantial pile of discarded filament. No single-color comparison or measured waste weight was reported, so this example can’t tell you how much time or plastic color changes will add to your prints.
Before choosing the Combo, prepare a model you’d want in several colors in Studio. Inspect its number of filament changes, total material use and estimated time. Several identical objects printed together can share color changes within each layer, reducing the extra time and waste per object.
Using And Maintaining The P2S
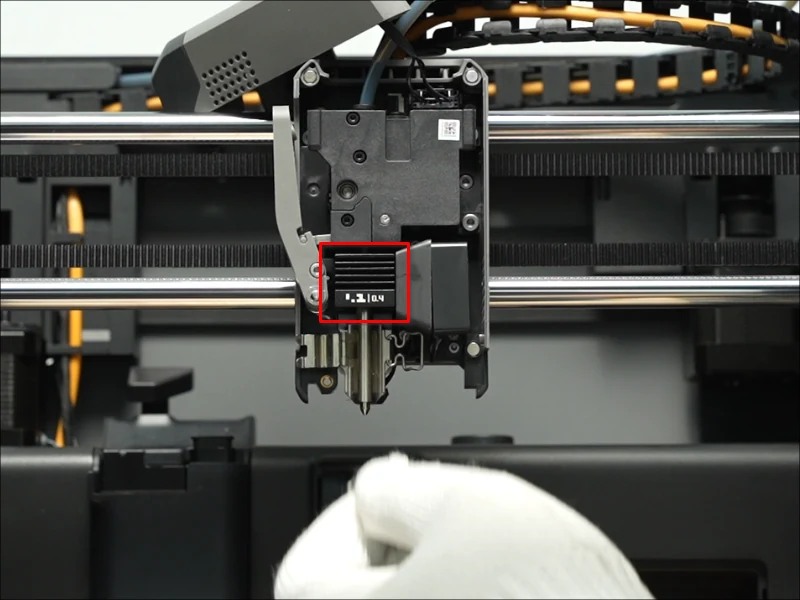
The hotend, the heated nozzle assembly, is easier to change on the P2S. It unclips without disconnecting delicate wires. Let it cool and disconnect power before maintenance. Easier removal helps when changing nozzle sizes or replacing a blocked hotend, but a jam farther up in the filament-feeding mechanism can still require taking that mechanism apart.
Routine care includes cleaning the printing plate, clearing loose plastic and maintaining the rods and screws that guide movement. Follow Bambu’s schedule and lubricant instructions; heavy daily use calls for more frequent attention.
Budget for replacement nozzles, cutters, wipers, feed tubes and filters as they wear. You don’t need a drawer full of spares immediately, but consider how a wait for replacement parts would affect you, especially if you’re printing paid jobs.
For consumer purchases directly from Bambu’s US store, the manufacturer lists a two-year limited warranty. Normal wear on consumables isn’t covered like a manufacturing defect. Keep your receipt and packaging; support may ask for photos, videos or printer logs to assess a fault.
If you’re buying through a reseller, its return and replacement rules apply. Business purchases need their own terms checked, because Bambu’s published consumer statement applies to individual customers. A warranty also doesn’t promise that a repair will finish before your next paid job.
The camera and improved internal lighting help you check whether a print is progressing. To inspect a tiny gap or confirm that a part has the right dimensions, you’ll need to check the finished object in person.
Automatic failure detection can pause a job when it spots a problem, including tangled strands of plastic commonly called “spaghetti.” False pauses have also been reported.
If the printer stops, check what happened before resuming; a model that has come loose from the plate won’t reattach when you resume. Adjusting detection sensitivity may help with unnecessary interruptions, but no setting guarantees that every failure will be caught.
One reviewer reported more than 300 printing hours, which offers some reassurance but doesn’t show how the P2S holds up over years. Reports of individual feeding faults don’t tell you how often buyers experience them. There isn’t enough comparable long-term evidence to claim that the P2S lasts longer than the P1S.
You can print without using Bambu’s cloud service. LAN-only mode lets you use your local network, and USB printing is another option. LAN-only mode gives up cloud features, including access through the Bambu Handy phone app, which requires linking the printer to an account.
Developer Mode allows direct control through third-party software, but that doesn’t mean you can freely change all of the printer’s built-in software. If you need a particular slicer or a connection to other workshop software, confirm how it connects to the P2S before buying.
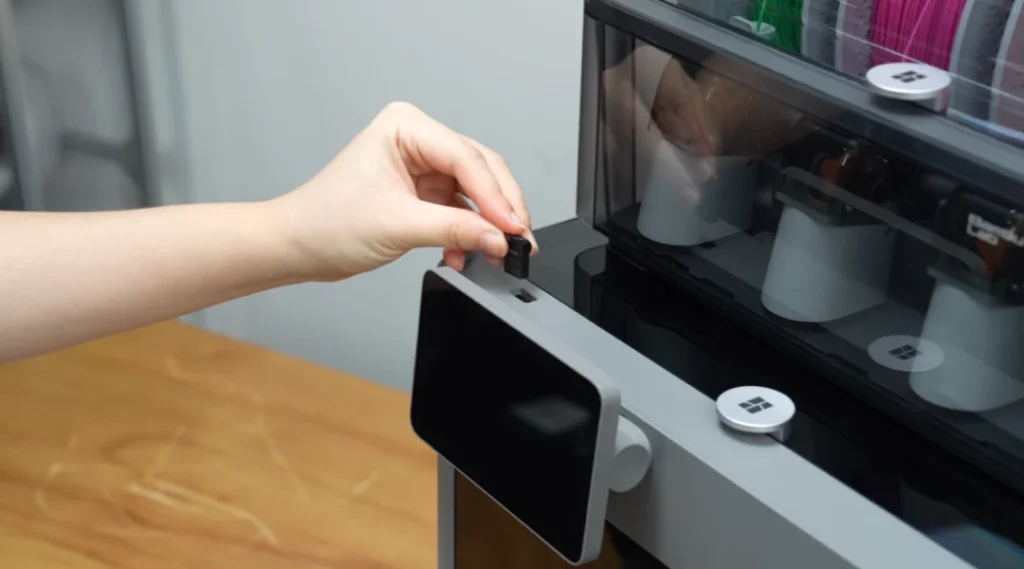
I’d put the P2S in a ventilated work area away from where you sleep or take calls. Its fans and movement remain audible through the enclosure.
Filament printing also releases particles and gases. The enclosure and carbon filter don’t guarantee that the surrounding air is safe to breathe, and the P2S’s cool-air mode doesn’t send all outgoing air through its filter.
Plan effective ventilation, preferably with extraction that removes emissions near the printer. Don’t judge air quality by smell. That applies to PLA too.
What Makes The P2S Worth The Expense
For a first enclosed printer, the P2S reduces the work you have to do yourself: adjusting the printer, managing prints and changing nozzles. Those benefits matter most if you want to spend your time designing or making things and you’re willing to learn ordinary printer care.
If you have a working P1S, replacing it means paying for a complete printer to make familiar tasks easier. You keep essentially the same print area, and the reported results don’t establish that you’ll consistently get better finished parts.
Think about which tasks you’d want the new printer to make easier. Frequent nozzle swaps or an awkward screen may justify the change for you. Occasional single-color PLA printing is a weaker case. Bambu has also said the P1S remains in production and supported, so the P2S’s arrival alone isn’t a reason to abandon it.
Adding a second printer lets you run two jobs at once. That can matter more than a modest speed improvement. Before buying, check what’s holding up your work: printing time, preparing files or cleaning up finished pieces. Another P2S won’t help much if you already struggle to keep your current printer supplied with ready-to-print work.
Compare the cost of everything you’ll need. The standalone P2S costs less than the Combo, but it leaves you to arrange drying and manual spool changes. With the Combo, you’ll also need to maintain the feeder and budget for desiccant, the material that absorbs moisture inside it.
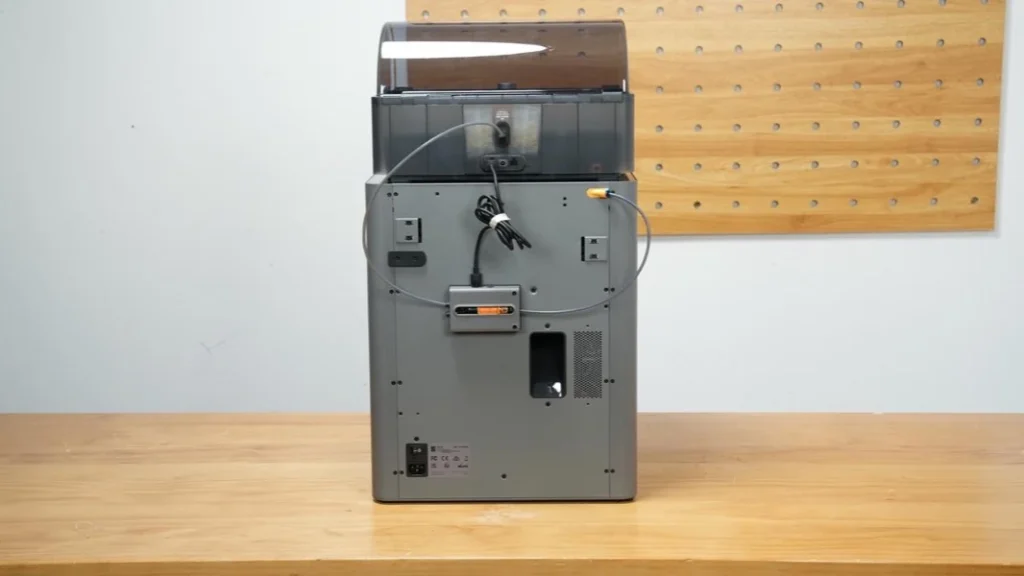
Budget for an official AMS 2 Pro power adapter if you want drying during printing. For drying between jobs, one unit can use printer power; additional units drying at the same time need their own adapters. You’ll also need to budget for ventilation and filament, including plastic used for supports or discarded during color changes.
The closest alternative worth investigating is the X2D, especially if you often need to remove supports or print with two materials. Its main nozzle can print the model while the second prints supports in a compatible material chosen to separate easily from it. That gives you a reason to consider it if removing supports often damages your prints.
Match the support filament to the model material: Bambu’s Support for PLA/PETG, for example, is intended for those two plastics. The second nozzle has different material limits, so check Bambu’s X2D filament compatibility guide for your chosen pairing.
The X2D also adds a separate chamber heater in a similarly sized printer, and generally costs more than a P2S with the same kind of bundle. Its two-nozzle print area is 235.5 × 256 × 256 mm, 20.5 mm narrower than the P2S’s. Check that your models and their supports fit before choosing it.
If size is the problem, the H2S offers a larger 340 × 320 × 340 mm print area and a separate chamber heater, but costs more with an equivalent bundle and needs more space. Those capabilities give you a reason to spend more if the P2S can’t handle your intended parts.
Who The P2S Fits Best
I’d put the P2S on your shortlist if you’re buying your first enclosed printer, your intended parts fit its build area and you want straightforward software with less manual calibration. Start with ordinary PLA or PETG projects, learn what makes a print succeed, and treat more demanding plastics as another skill to develop.
Choose the standalone printer if you mostly make single-color parts and don’t mind loading each spool. Choose the Combo if keeping several filaments ready, switching automatically to a backup spool or regular multicolor printing will save you enough effort to justify the cost. If you want drying during printing, include the external adapter and allow for the reduced drying temperature.
Keep a working P1S if you’re happy with its results and the P2S’s convenience changes don’t solve a frequent annoyance. Add another printer when you need to run two jobs at once; replace one when it no longer meets your needs.
Look elsewhere if you routinely need larger one-piece parts, controlled chamber heating or a software setup the P2S can’t support. And sort out the workspace first if your only option puts it in an occupied room without adequate ventilation.


