Prusa Core One+ INDX Review
Four tools cost less than eight; keeping a satisfactory MMU3 costs less upfront.
Our verdict
I’d choose INDX for frequent multicolor prints or mixed-material supports, provided the smaller print area fits your work. Start with four tools when they cover your projects; choose the assembled Gen 2 printer if you want to avoid the conversion work. I’d keep a satisfactory single-color setup, and wait if proven long-term unattended reliability is essential.
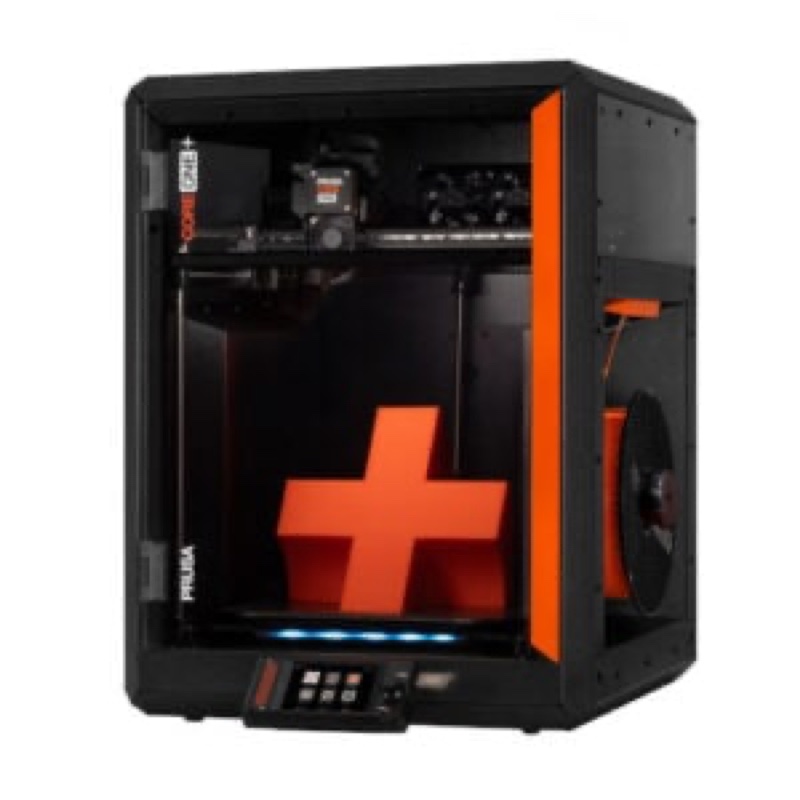
Best atFrequent color changes and support interfaces that benefit from separate nozzles.
Less suited toMostly single-color work, regular highly abrasive filament use, or buyers who need established long-term dependability.
The Key Specs
| Print area | 248 × 205 × 270 mmCheck large models in the INDX slicer profile; the conversion removes 2 mm of width and 15 mm of depth. |
|---|---|
| Filament choices | Four or eight separate nozzle toolsThree model colors plus one support filament use all four tools; five filaments need the larger setup. |
| Material-change waste | No shared-nozzle flushing; priming pellets remainBudget for discarded plastic, and do not assume the upgrade will pay for itself through filament savings. |
| Conversion work | Substantial disassembly, assembly and calibrationAllow workspace and time for tool alignment and nozzle-cleaner adjustment. |
| Supplied nozzles | Surface-hardenedPrusa advises against regular highly abrasive filament use; choose a suitable nozzle before making these materials your main workload. |
| Mixed-material supports | Separate filaments can help support interfaces pull awayMaterial settings still need to work together; separate nozzles do not guarantee compatible bed temperatures or strong bonds. |
Which Version Should You Buy?
- Four tools
- My starting choice for projects needing up to four filaments per print; costs less than eight.
- Eight tools
- Choose this when planned jobs need five to eight filaments, including any separate support material.
- Conversion kit
- For CORE One or CORE One+ owners comfortable rebuilding the printer; match the kit to your printer generation.
- Complete Gen 2 kit or assembled printer
- Choose the kit if you want to assemble a new printer; I’d choose factory assembly to avoid the conversion work.
Budget beyond the printer. Allow for shipping, tax, several filament spools and any dry storage or filament dryer you need. Expanding from four to eight tools also requires the matching tools, filament sensors, tubing and spoolholders; confirm that the parts are available for your edition.
More Specs And Ownership Details
| Printer generation | Earlier-printer conversion packages add Gen 2 belts, pulleys and heatbed expansion mounts; a Gen 2 printer already has these parts. |
|---|---|
| Spool storage | Spoolholders accept Prusa USS Dryboxes, including an eight-box arrangement. Sealed storage does not dry already damp filament. |
| Workspace | Leave room beside the printer for spools and tubing, plus access to the cover and waste collector. |
| Maintenance | Check the waste collector before long jobs and remove loose scraps. Prusa schedules a group of maintenance checks every 200 printing hours. |
| Edition and setup | Use the assembly instructions and PrusaSlicer profile for your hardware. Early Founder’s Edition results do not establish long-term dependability for the newer Prusa configuration. |
I’d consider the Prusa CORE One+ with INDX if you regularly print several colors in one object or want supports that come off more easily. Each filament gets its own nozzle, so changing materials doesn’t mean flushing the previous plastic out of a shared nozzle.
I’d consider the upgrade for those jobs, provided you’re comfortable assembling and adjusting it. For mostly single-color printing, keep your existing setup. The current Prusa edition, including complete Gen 2 printers, is distinct from Bondtech’s early Founder’s Edition. Early printing results are encouraging, but they don’t establish long-term dependability for the newer configuration.
What INDX Adds To The CORE One+
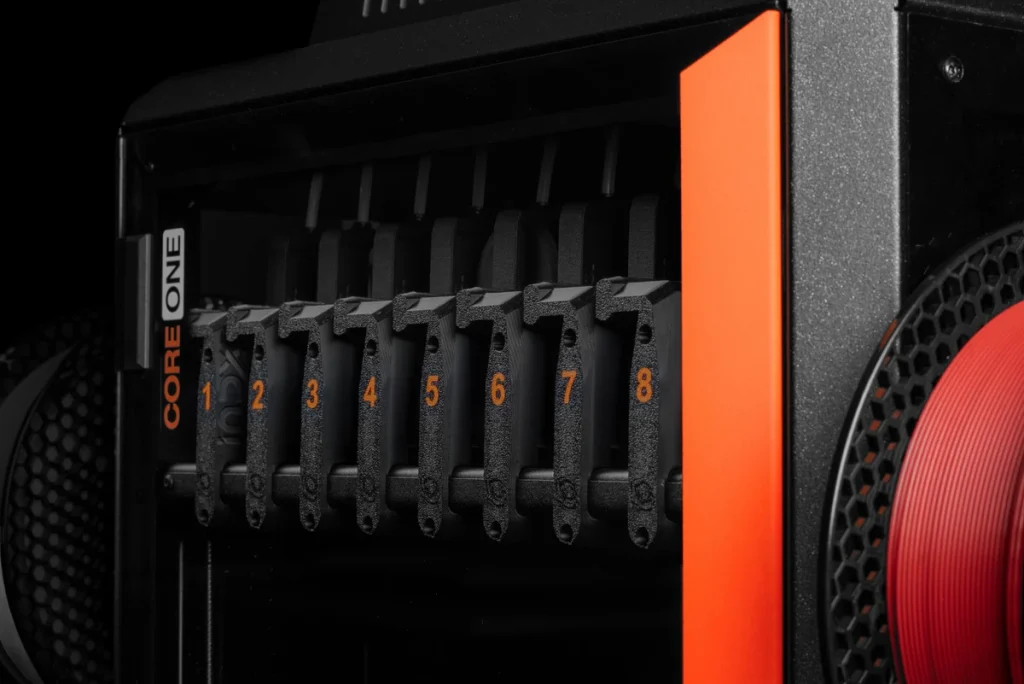
A standard CORE One+ has one nozzle. INDX replaces its print head with a moving head that picks up separate nozzle tools from a rack. Each tool keeps its filament—the plastic strand fed from a spool—loaded and ready to use.
That’s different from Prusa’s MMU3 filament changer, which feeds several filaments through one nozzle. INDX avoids having different plastics share that heated passage. Four colors of PLA, a common printing plastic, are still one material type. Combining PLA with PETG, another common plastic, adds a separate challenge: the materials need settings that work together.
Prusa offers four- and eight-tool conversion kits for the CORE One and CORE One+, plus complete CORE One+ Gen 2 INDX printers as kits or assembled printers. You can order them now, but expect a wait before shipping.
The conversion includes the moving head, four or eight nozzle tools, mounting parts, tubing, top cover, spoolholders and nozzle-cleaning hardware. Choose the version for your printer generation. The package for earlier printers adds Gen 2 belts, pulleys and mounts that let the print bed expand as it heats up. A Gen 2 printer already has those parts.
Usable printing space becomes 248 × 205 × 270 mm—2 mm less across and 15 mm less front to back. If a model nearly fills your current print bed, check that it fits with the INDX printer settings selected in PrusaSlicer, the software that prepares a model for printing. A part that fitted before may now need to be printed in smaller pieces and put together.
Installing And Adjusting INDX
Installing the conversion means taking apart and rebuilding much of the printer. The official instructions include removing the original Nextruder print head, working on the bed and wiring, fitting the INDX head and filament sensors, and assembling the tool docks and spoolholders. You need room to lay out parts and reach into the printer from several directions.
One experienced owner reported roughly ten hours assembling an eight-tool Founder’s Edition, with the spoolholders and belt attachment proving awkward. That’s one person’s experience with early hardware, not a time estimate for a beginner or a current complete-printer kit. Allow a weekend so you can stop, check a step and come back without rushing.
If you’re installing Gen 2 parts at the same time, use Prusa’s combined-upgrade instructions. They explain when to move between the two assembly guides. Doing each upgrade separately would mean repeating some disassembly.
After assembly, the setup wizard guides you through checks of belt tension, dock positions, fans, filament sensors and tool alignment. Aligning the tools makes sure every nozzle prints where it should, so a second color meets the first without a gap or overlap.
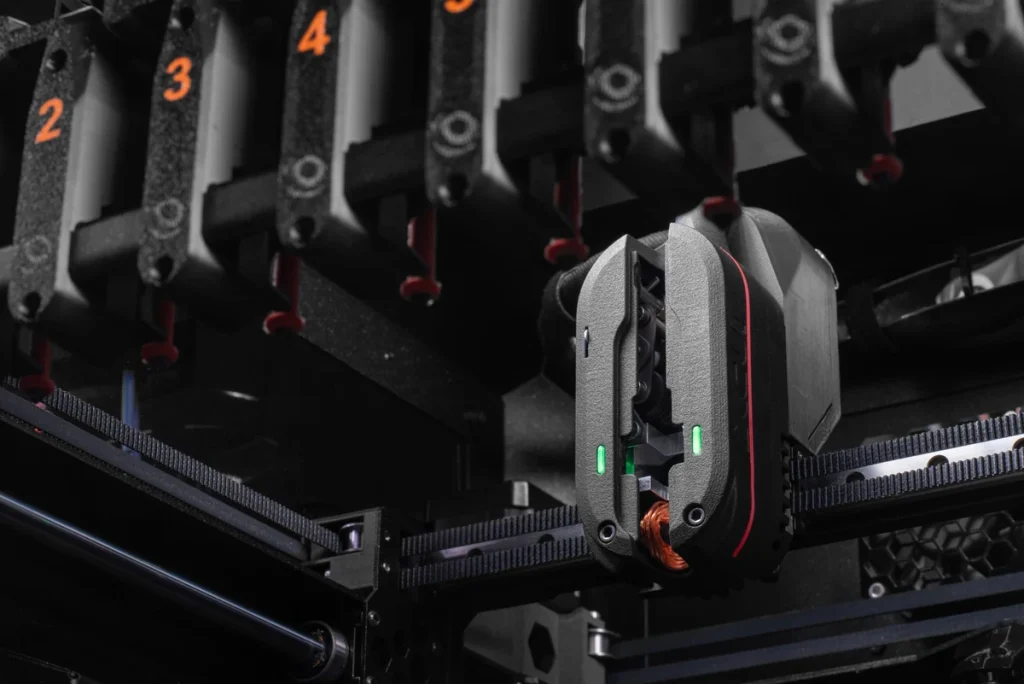
Pay particular attention to the nozzle cleaner. Its adjustment has separate steps for height and position. You need to see where the nozzle meets the cleaning blocks, so good lighting and easy front access matter. Follow the instructions for your edition rather than copying an early owner’s modification.
Once the setup checks pass, start with a small multicolor print. Check whether the colors meet cleanly and whether stray plastic has stuck to the print. If taking apart a working printer sounds more stressful than interesting, the factory-assembled INDX version is the more sensible option for a new purchase.
How INDX Handles Colors And Different Materials
Early multicolor results show that INDX can print cleanly, but nozzle cleanup matters. In one reported test of an eight-tool Founder’s Edition on a CORE One, an eight-color butterfly used to check alignment printed successfully on its first attempt in 1 hour 14 minutes. Its wings were only two layers thick, so it showed that the nozzles lined up for that print, but said little about performance over longer jobs.
Before returning to the model, a nozzle pushes out a little plastic to get a steady flow, producing small pellets that go into a collection bin. An eight-tool Founder’s Edition owner separately reported pellets and strings of plastic getting carried onto prints when using that bin. Printing a prime tower—a small extra structure beside the model that’s discarded afterward—improved their results.
Their later update said changes to the firmware—the software running on the printer—and print settings made them prefer pellet collection. The final software versions weren’t given. That doesn’t establish which change solved the problem or how common the initial trouble is on current INDX printers.
Different materials can make supports easier to remove. Supports hold up parts of a model during printing and are removed afterward. The support interface is the thin layer where the support touches the model. Using a different plastic for that layer can help it separate with less damage to the underside of the part.
One eight-tool Founder’s Edition owner reported easy support removal from a small computer model printed in Kingroon and Prusament PETG, using Verbatim PLA for the interface. In PrusaSlicer, they assigned PLA to the interface, set the gap between support and model to zero, and used a bed temperature suited to PETG. The reported job took about five hours with 437 tool changes. That result came from one job, so it doesn’t show how consistently the combination works.
The reverse combination needs care too. Another Founder’s Edition owner initially couldn’t successfully print a PLA model with PETG at the support interface, then reported success after several attempts using a support test model and revised settings. Their tool count and final settings weren’t fully documented, so there’s no complete set of settings to copy.
In both examples, the supports pull away from the model; they don’t dissolve in water. Separate nozzles also don’t guarantee that any two materials will bond into a strong finished part or print successfully at the same bed temperature.
Before buying, check that the supplied nozzles suit your filament. Bondtech corrected its original hardened-nozzle claim: supplied nozzles are hardened at the surface. Prusa advises against regular use with highly abrasive filaments, which wear down nozzles, such as glow-in-the-dark filament or composites containing lots of added particles. If those are your main materials, wait until you can buy a suitable nozzle.
How Much Time And Filament Does INDX Save?
With each filament kept in its own nozzle, INDX avoids the waste from flushing out a shared nozzle at every change. The pellets it produces still count as waste.
Prusa’s own comparison, using manufacturers’ default print settings, reported 29 g of INDX waste for an 81.7 g model. That’s a manufacturer result for one job, not a general savings figure. It also shows why even tiny pellets add up over many changes.
A useful speed or running-cost comparison needs the same model, materials and print quality, measuring the total time and weighing the waste. That needs to include startup time, failed attempts and discarded pellets. The available early results don’t establish that complete comparison for the current Prusa edition, so there’s no sound estimate of how long savings would take to cover the upgrade cost.
Look at how often your prints change filament. INDX has more chance to save time on a model that alternates colors throughout hundreds of layers than on a sign with a few color changes near the top. If your existing filament changer already finishes your jobs overnight with acceptable waste, faster switching alone may not justify replacing it.
Using INDX Day To Day
Leave room beside the printer for spools and enough access to change them, open the cover and reach the waste collector. A shelf that fits the bare printer can still be awkward once several rolls and their tubes are attached.
The spoolholders accept Prusa USS Dryboxes, including an eight-box arrangement. These keep filament in sealed storage while feeding it to the printer. They help keep moisture out, but don’t count on a storage box to dry out already damp filament. Follow the filament maker’s drying instructions when drying is needed.
Check the waste collector before a long job and remove loose scraps from the printer. Prusa describes the standard bin as holding waste from a few small jobs or one large one, which isn’t a guaranteed capacity for every model. Its maintenance guide also calls for regular checks of the nozzles, filament-feeding gears and moving parts, with a group of checks scheduled every 200 printing hours.
Firmware 6.9.0 supports both the Founder’s Edition and Gen 2 INDX, while the INDX support page lists PrusaSlicer 2.9.6. In PrusaSlicer, select the printer profile—the set of settings—for your hardware. Automatic tool alignment at print startup is helpful, but it doesn’t show that the nozzles will stay aligned over months of use. There’s still too little evidence about extended use and recovery after interruptions on the current edition to promise reliable printing without supervision.
Choosing Four Or Eight Tools For Your CORE One+
Count the filaments you need in a single job. Three model colors plus one support material use four tools. Four model colors plus a separate support material need five, so the four-tool version won’t cover that print as planned. You’d need to change the design, reduce its colors or choose more tools.
Four tools cost less and are a sensible starting point if your projects need no more than four filaments per print. Eight are worth considering when you already have jobs requiring five to eight filaments, or regularly want several materials ready without reloading. Unused tools don’t improve a two-material print simply by being present.
Prusa supports expanding from four to eight tools, and the current four-tool assembled printer has docking slots for expansion. Before relying on a later upgrade, confirm that you can buy all the expansion parts for your edition, including tools, filament sensors, tubing and spoolholders. Having space for another tool doesn’t mean you already have everything needed to use it.
For a new buyer, compare the cost of a complete INDX printer with a base printer plus conversion, matching assembled or kit versions. Budget for shipping, tax, filament, and any dry storage or dryer you need.
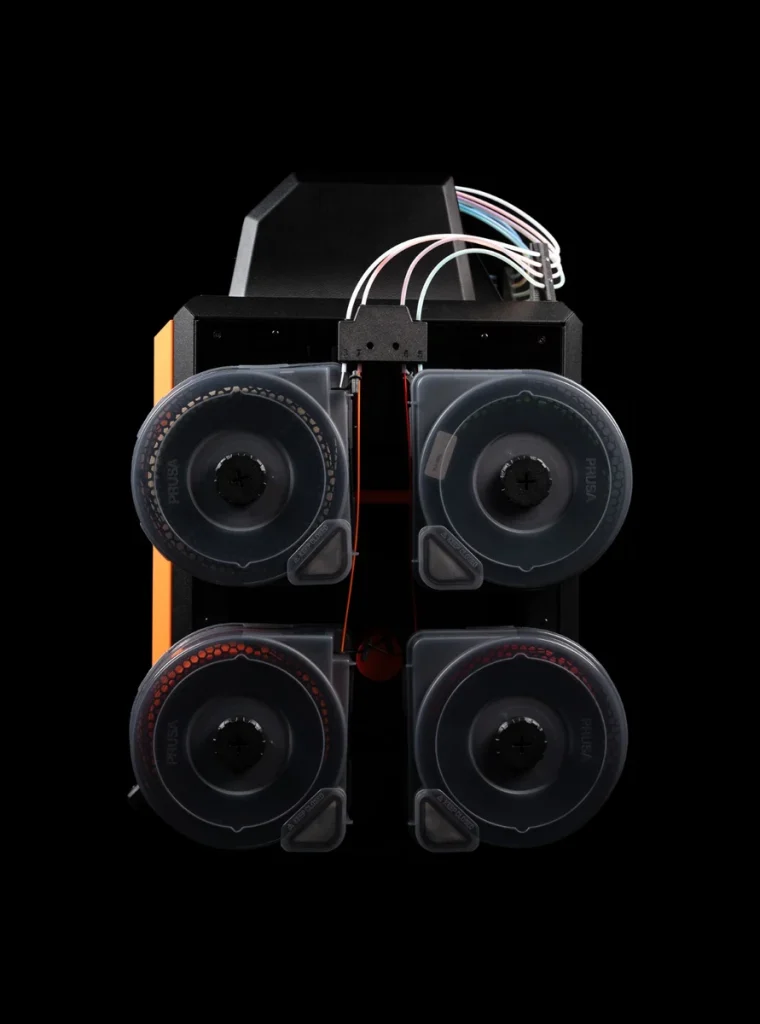
For an owner, keeping a satisfactory MMU3 costs less upfront than replacing it. Update it before deciding it’s too slow: Prusa released firmware that shortens filament changes. INDX should solve a problem you still have after that, such as needing separate nozzles for different materials or more than five loaded filaments.
Is The CORE One+ With INDX Right For You?
I’d upgrade a CORE One+ for frequent multicolor jobs or mixed-material supports if you enjoy working on the printer and your parts fit the reduced build area. Start with four tools when they cover your planned prints; buy eight when you can name the extra filaments you’ll use.
For a new buyer who wants INDX without the conversion work, choose the factory-assembled Gen 2 printer and allow for a wait before shipping. Prusa advertises round-the-clock technical support and a one-year warranty outside the EU for the complete printer. Don’t assume those sales terms apply to an earlier Bondtech purchase.
Keep your current setup if it already makes the parts you need. Wait if you regularly need to print abrasive filaments, or if you need evidence that the printer can reliably complete repeated jobs without supervision before committing.


